Overview
In this project, I will be going over the Proxmox bare metal hypervisor installation and setup process. Prior to this, I have only had experience with Oracle's VirtualBox, so going with a bare metal hypervisor was a definite change of pace. A bare metal hypervisor is specialized virtualization software that installs directly onto a physical server's hardware. Unlike a Type 2 hypervisor (like Oracle's VirtualBox), it does not require an underlying operating system (Windows 11, Linux, etc.), allowing it to interact directly with hardware resources to maximize efficiency, performance, and security. In short, I took an old gaming computer, formatted the hard drive, installed the Proxmox ISO onto a USB drive, and turned my computer into a dedicated virtualization platform.
- Intel i9-10900k CPU @ 3.70GHz - 20 cores
- 64GB DDR4 RAM
- 1TB NVMe M.2 SSD
- RTX 3070 GPU - Does not need to be this powerful unless you plan on getting into heavy GPU tools like Hashcat
System specifications
Why a Bare Metal Hypervisor?
When using a Layer 2 hypervisor, especially if ran on top of a heavy operating system like Windows 11, you will lose a portion of your performance to maintaining critical background systems. Although we are not working with a terrible CPU, I still wanted to maximize the performance I can get out of my machine. In addition to performance, the goal of this lab is to focus on networking and malware analysis, so separation of this system from my main network is a critical necessity. With our system specifications, we have enough CPU cores and RAM to dedicate resources to multiple virtual machines simultaneously without them fighting each other and a dedicated machine that will have a firewall sitting between my main network and my virtual network for maximized safety.
Proxmox Install
After loading the Proxmox ISO onto a USB drive, plug it into the target machine and make sure it is already turned off. Once plugged in, turn the computer on and press the boot order key your machine uses (F12 on my machine). Once the boot order menu appears, select the USB drive that you installed Proxmox onto. At the main menu, the option we want is Install Proxmox VE (Graphical). A GUI makes everything easier, but if you are comfortable enough in the terminal, feel free to select that option instead.
On the next screen, select the storage drive you want to install Proxmox on. Don't worry about backups and VM ISO storage for now — we can set that up after the installation. I chose my M.2 SSD for storage. Although Proxmox is a bare metal hypervisor, it is still extremely storage-intensive and benefits greatly from the low latency and high I/O operations that an M.2 provides. We will select an HDD later for backups and bulk data. We don't want to bottleneck ourselves at the very beginning!
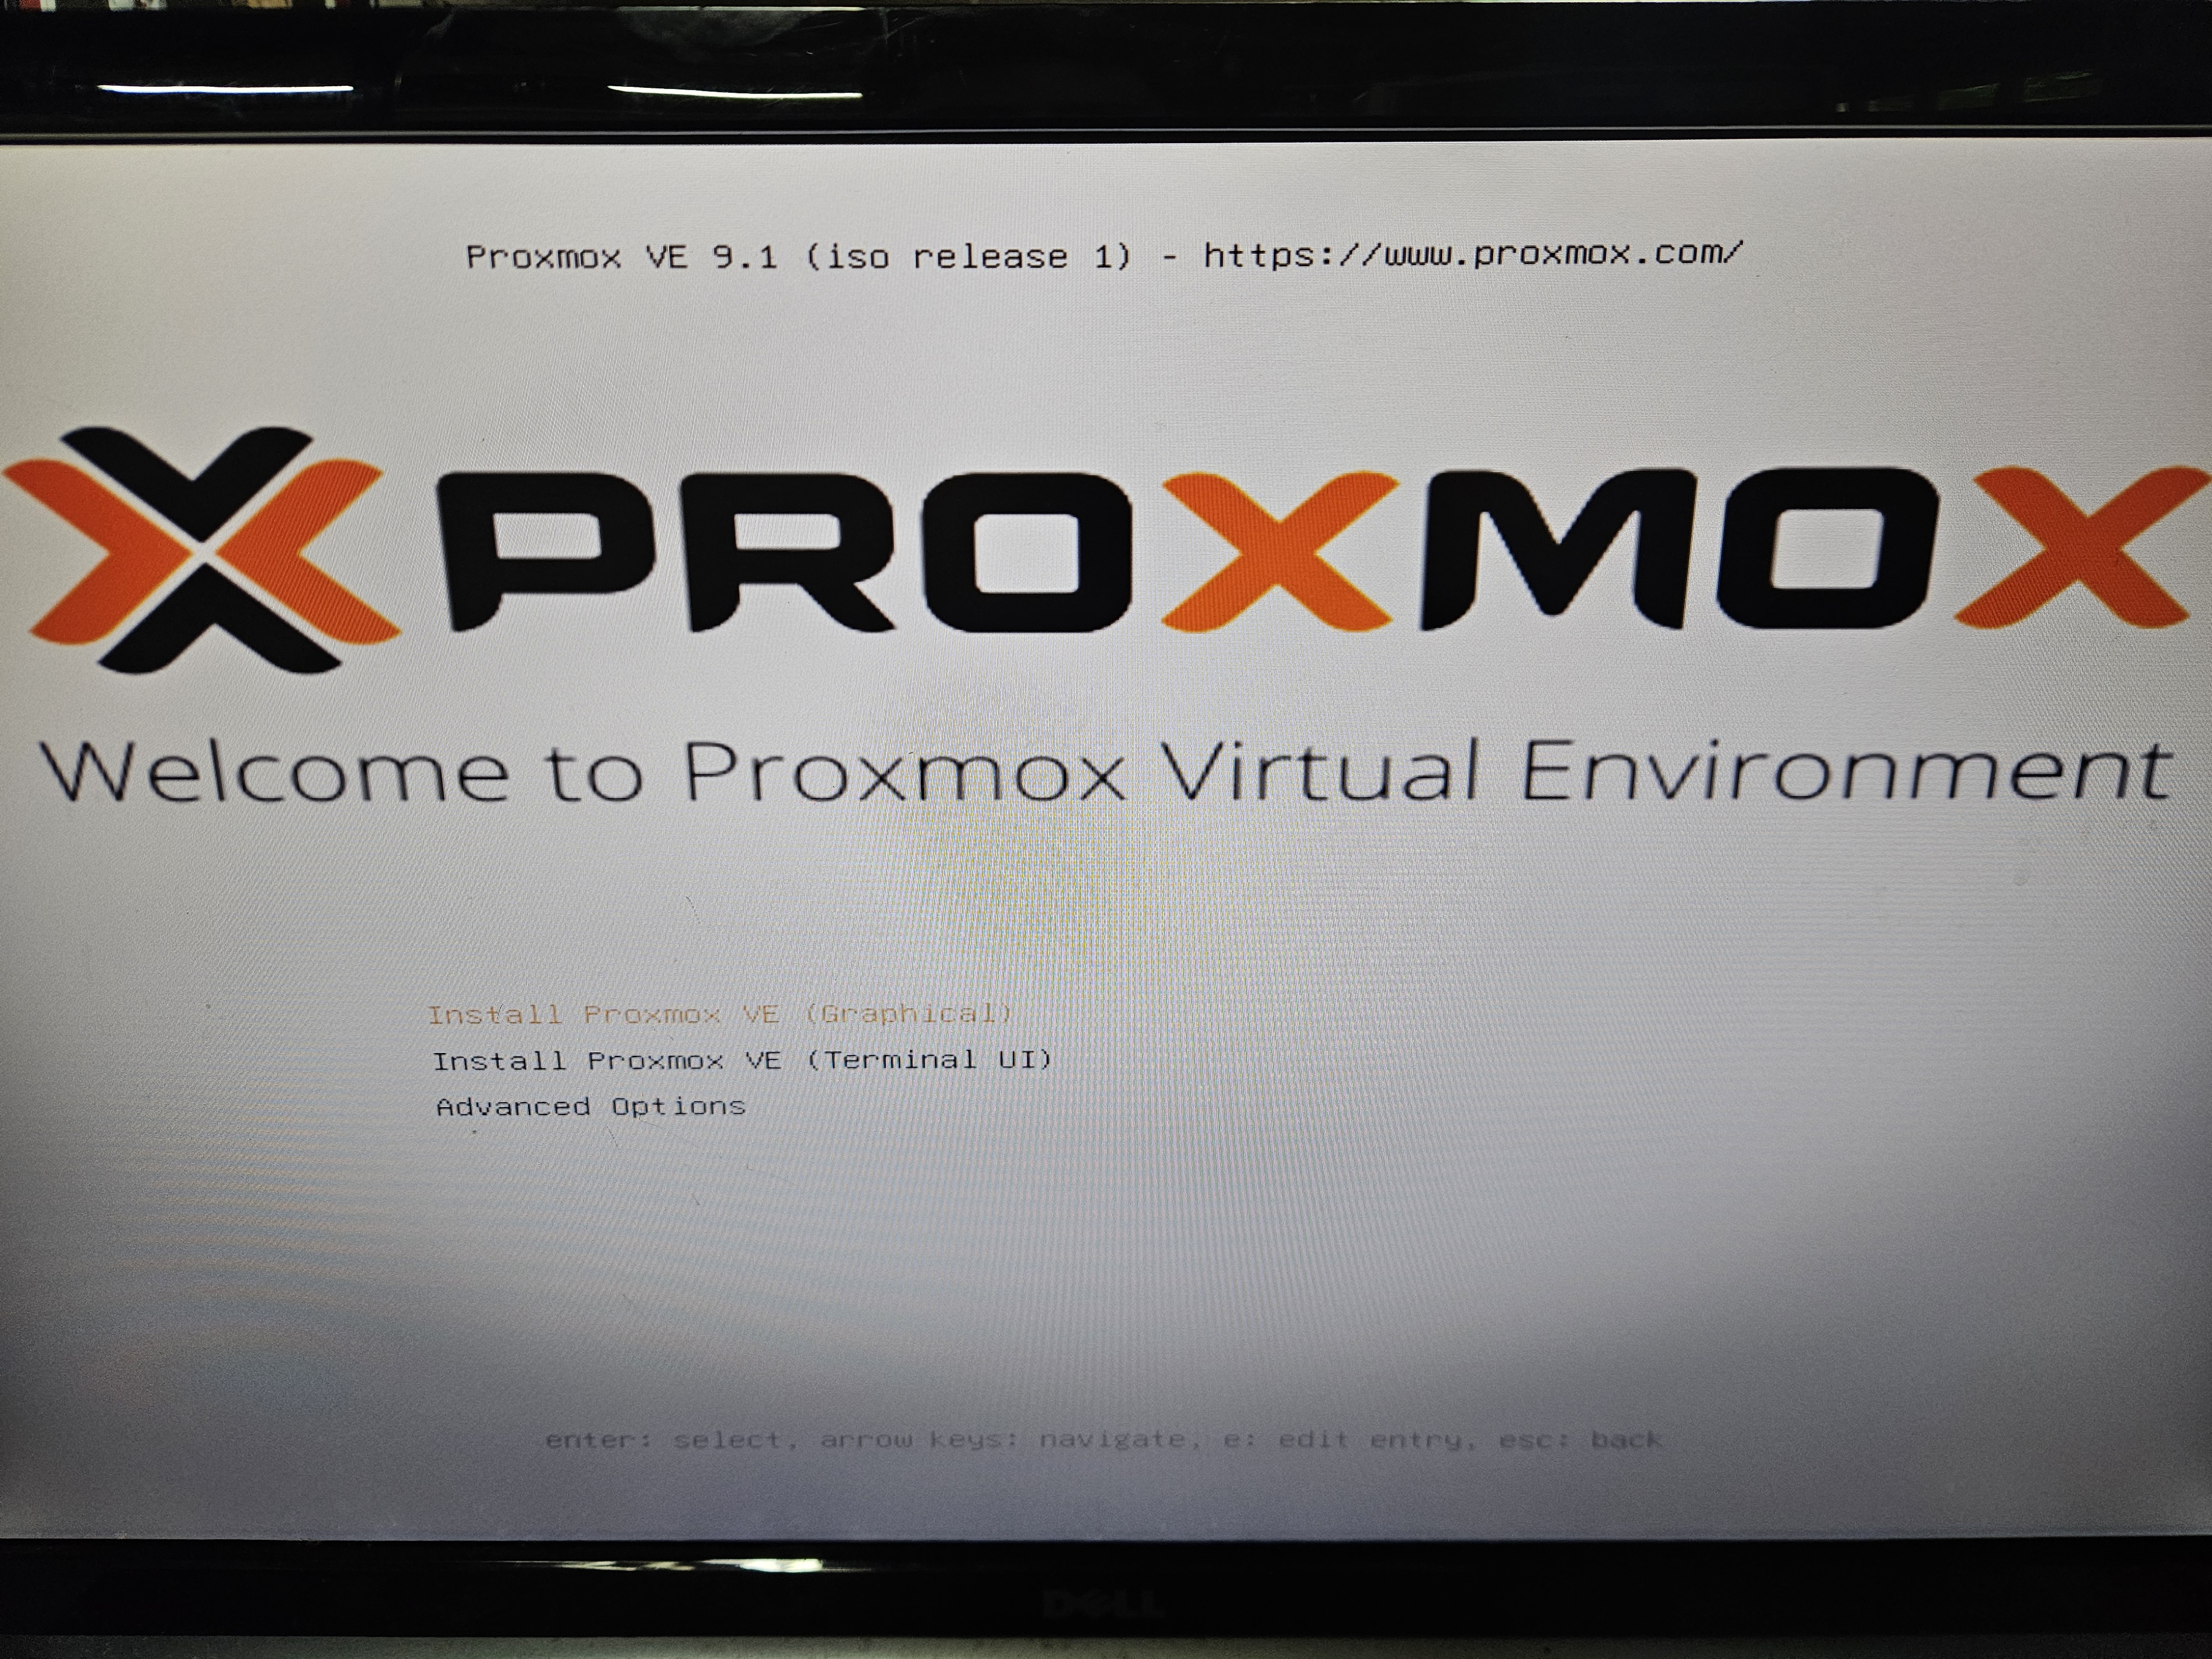
Proxmox main menu
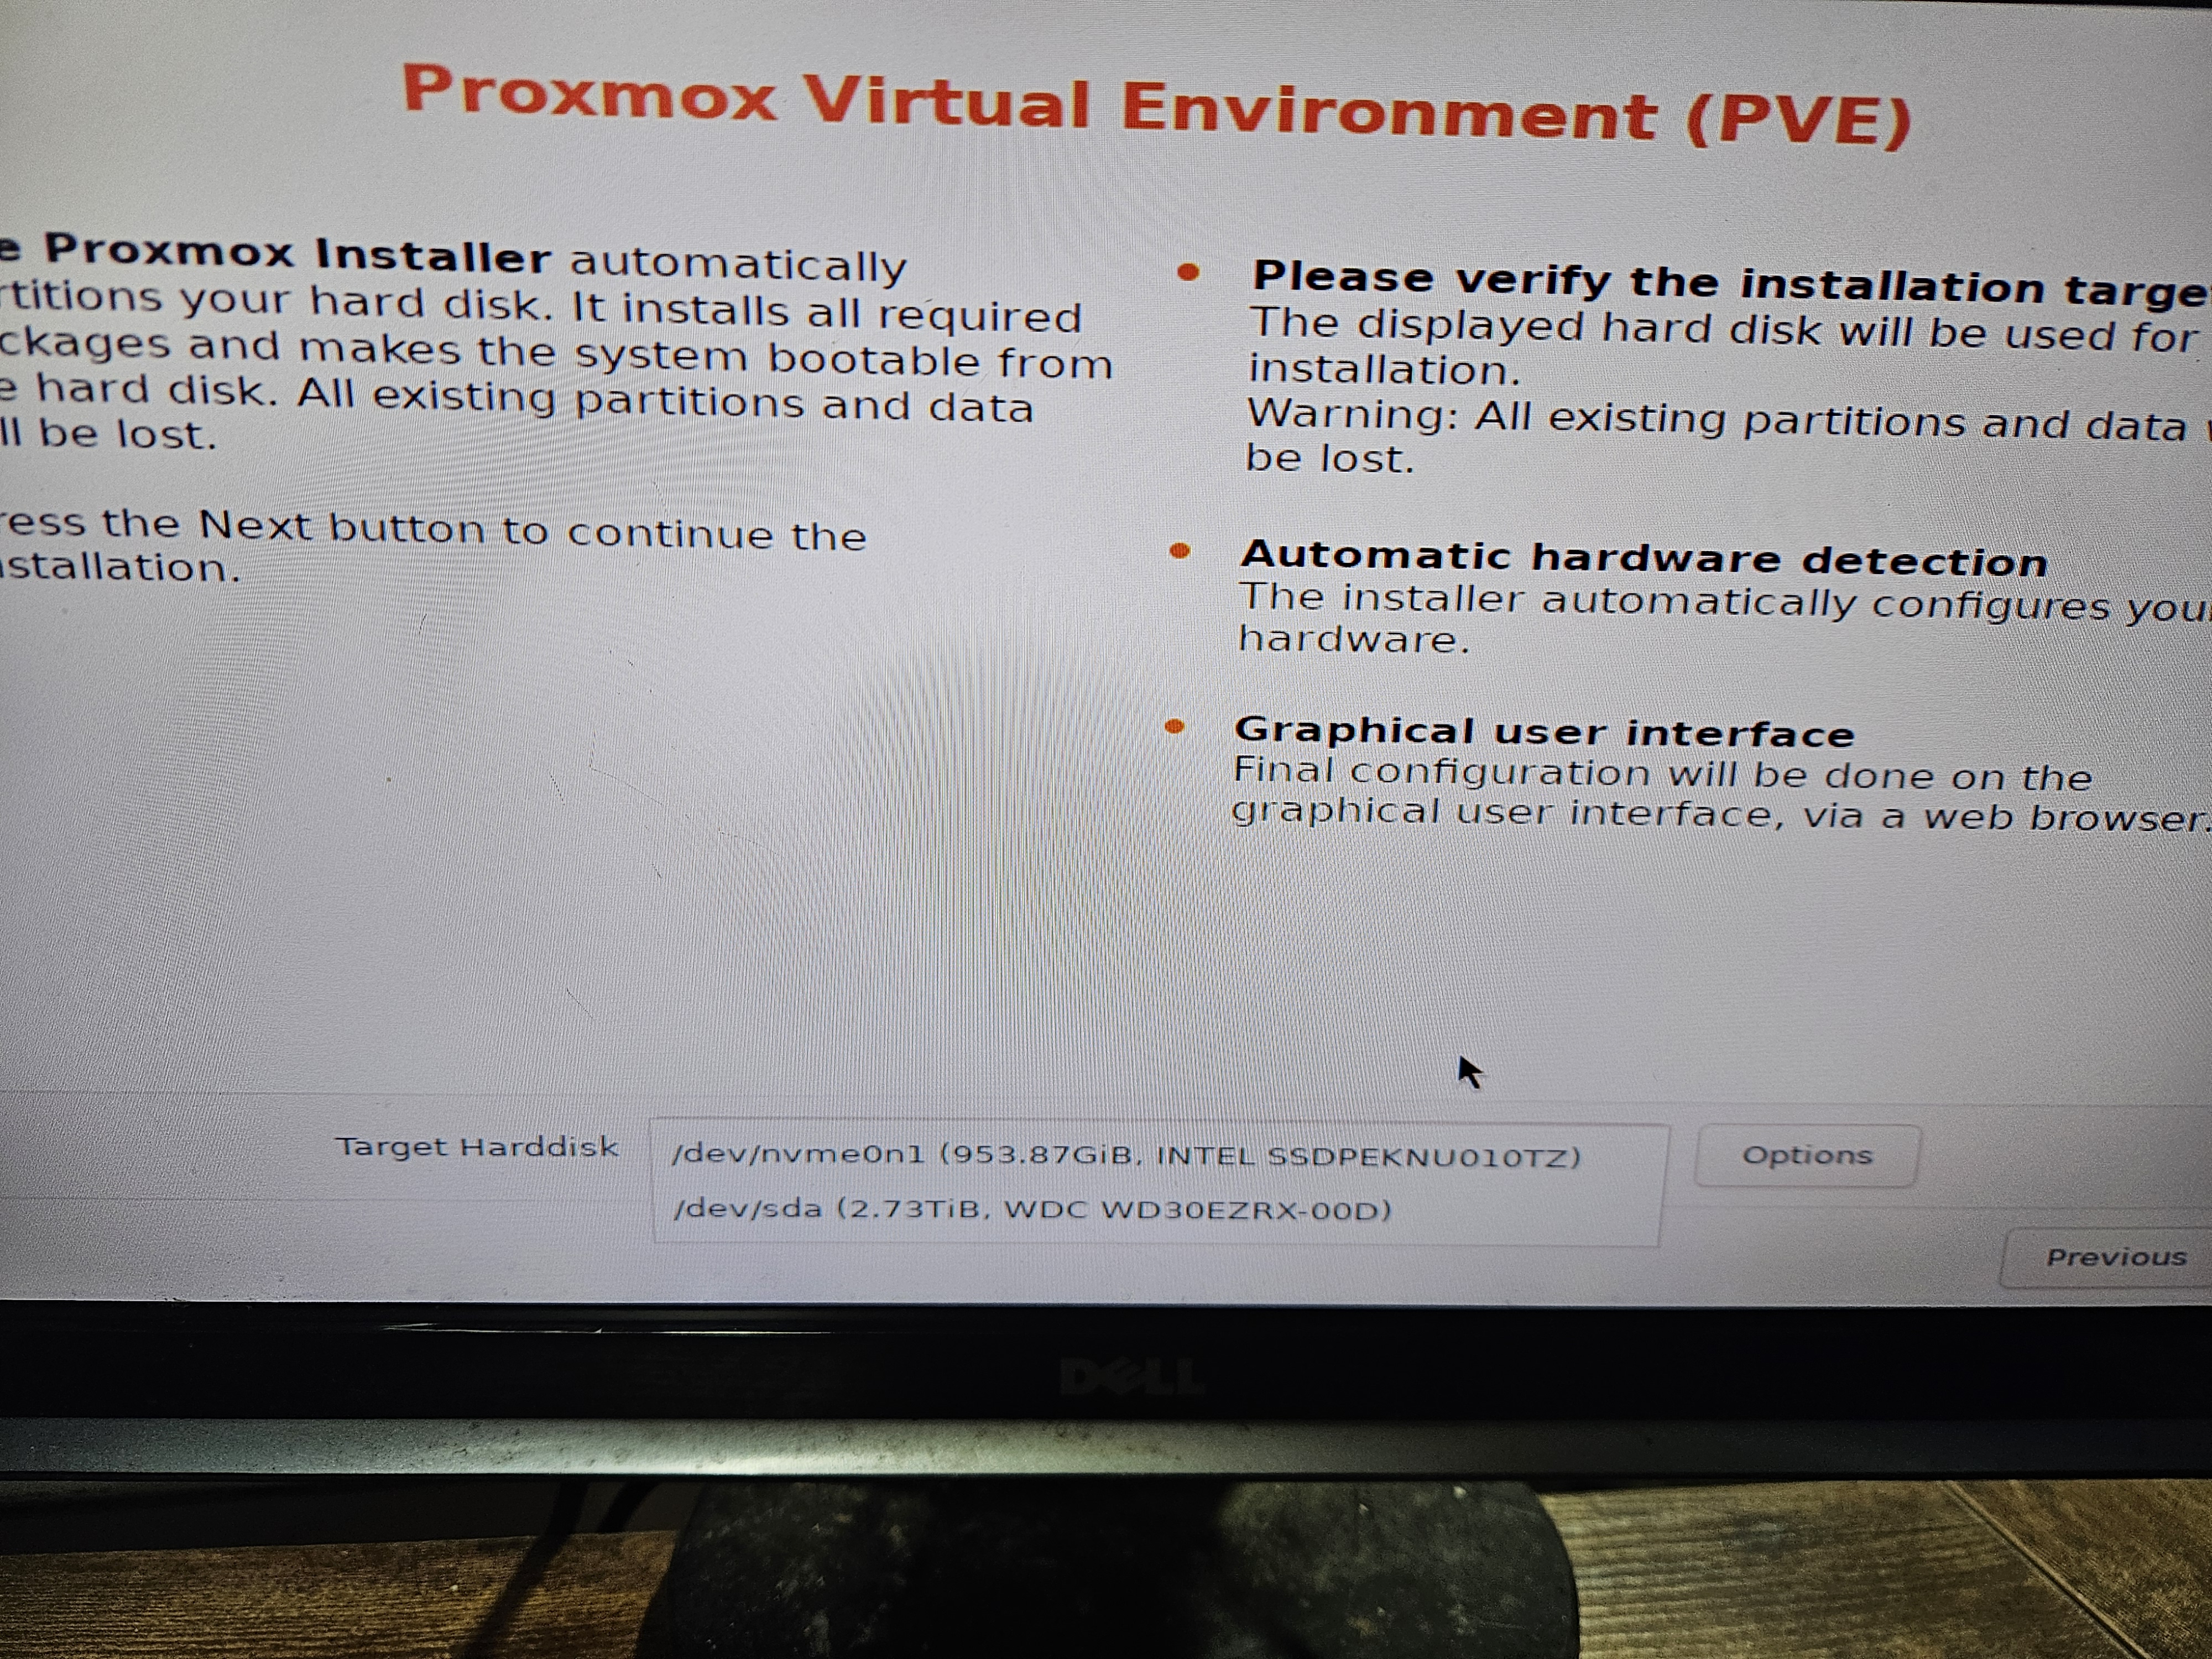
Storage selection
After storage, go ahead and set up the time zone. The next screen will have you set up a login password and an email. A quick note on Proxmox: it is different from platforms like VirtualBox. There are 2 layers that accounts operate at in Proxmox. Layer 1 can be considered the Linux OS layer. Layer 2 is the Proxmox application itself. The password we are setting up here is for the root account, which has access to both the Linux OS side and the Proxmox VE side. Depending on your use case, you may want to create a secondary account with fewer permissions than root (in my case, I will, since this machine will later be exposed to malware).
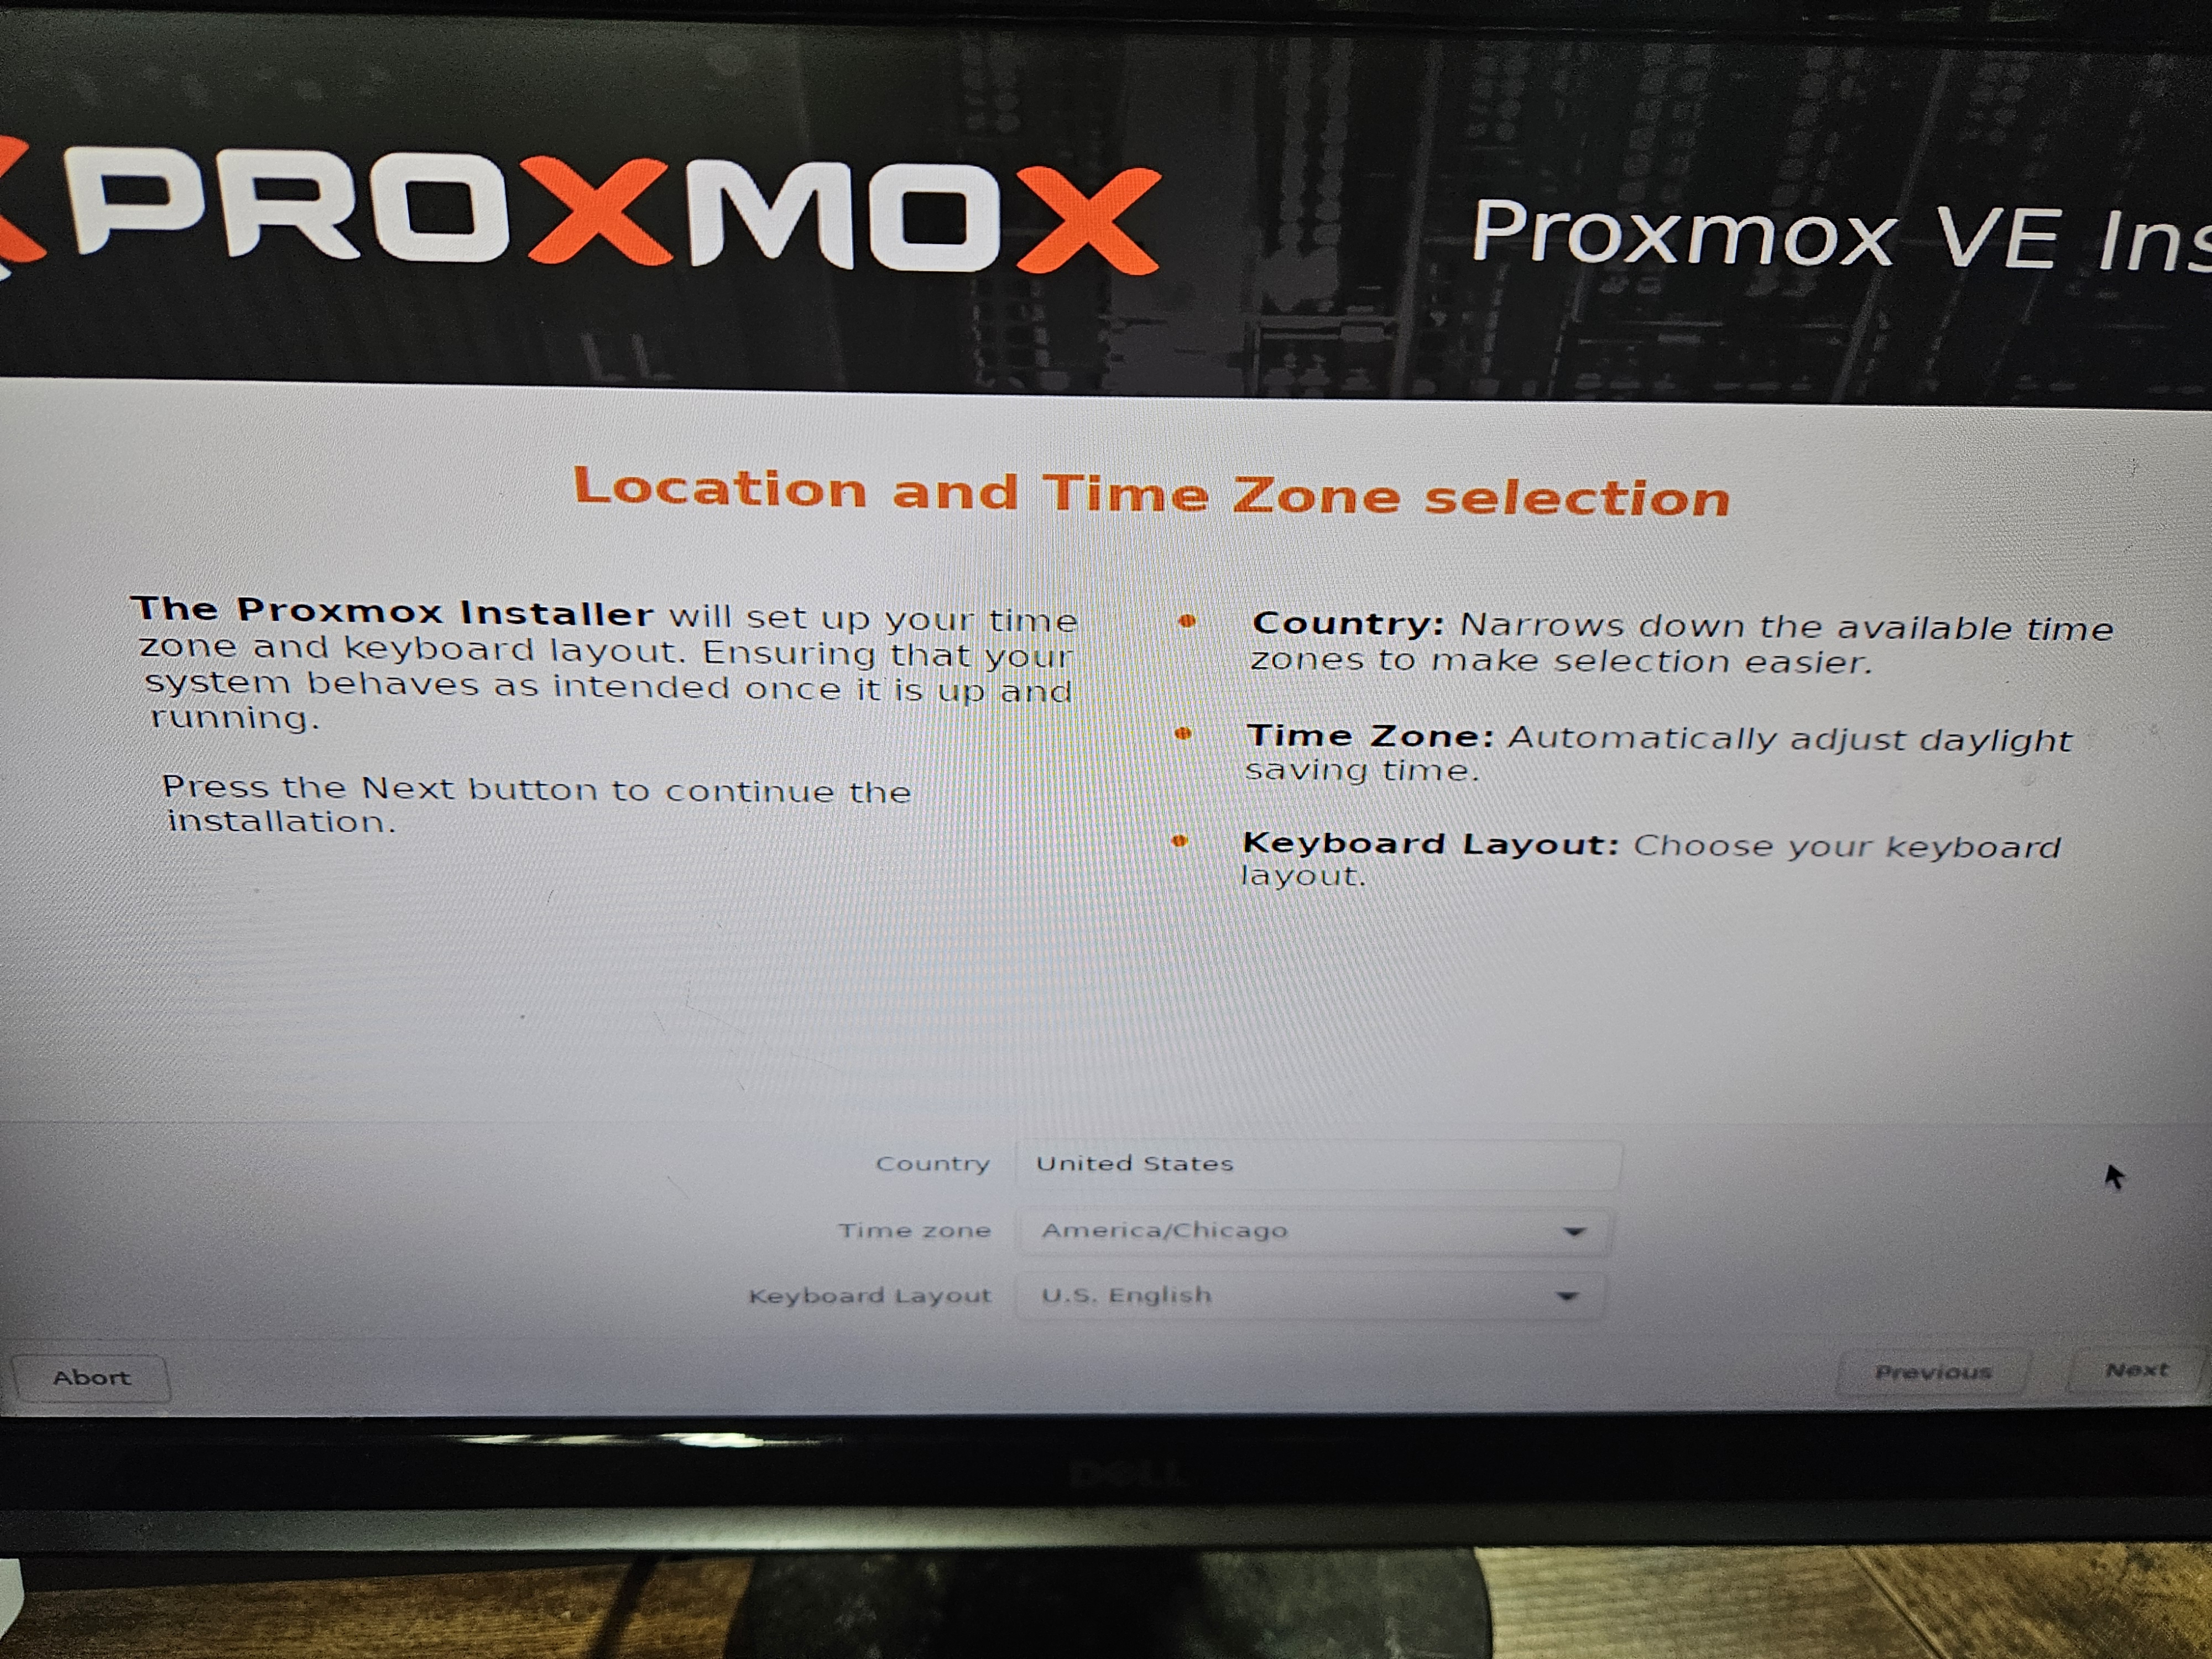
Time zone setup
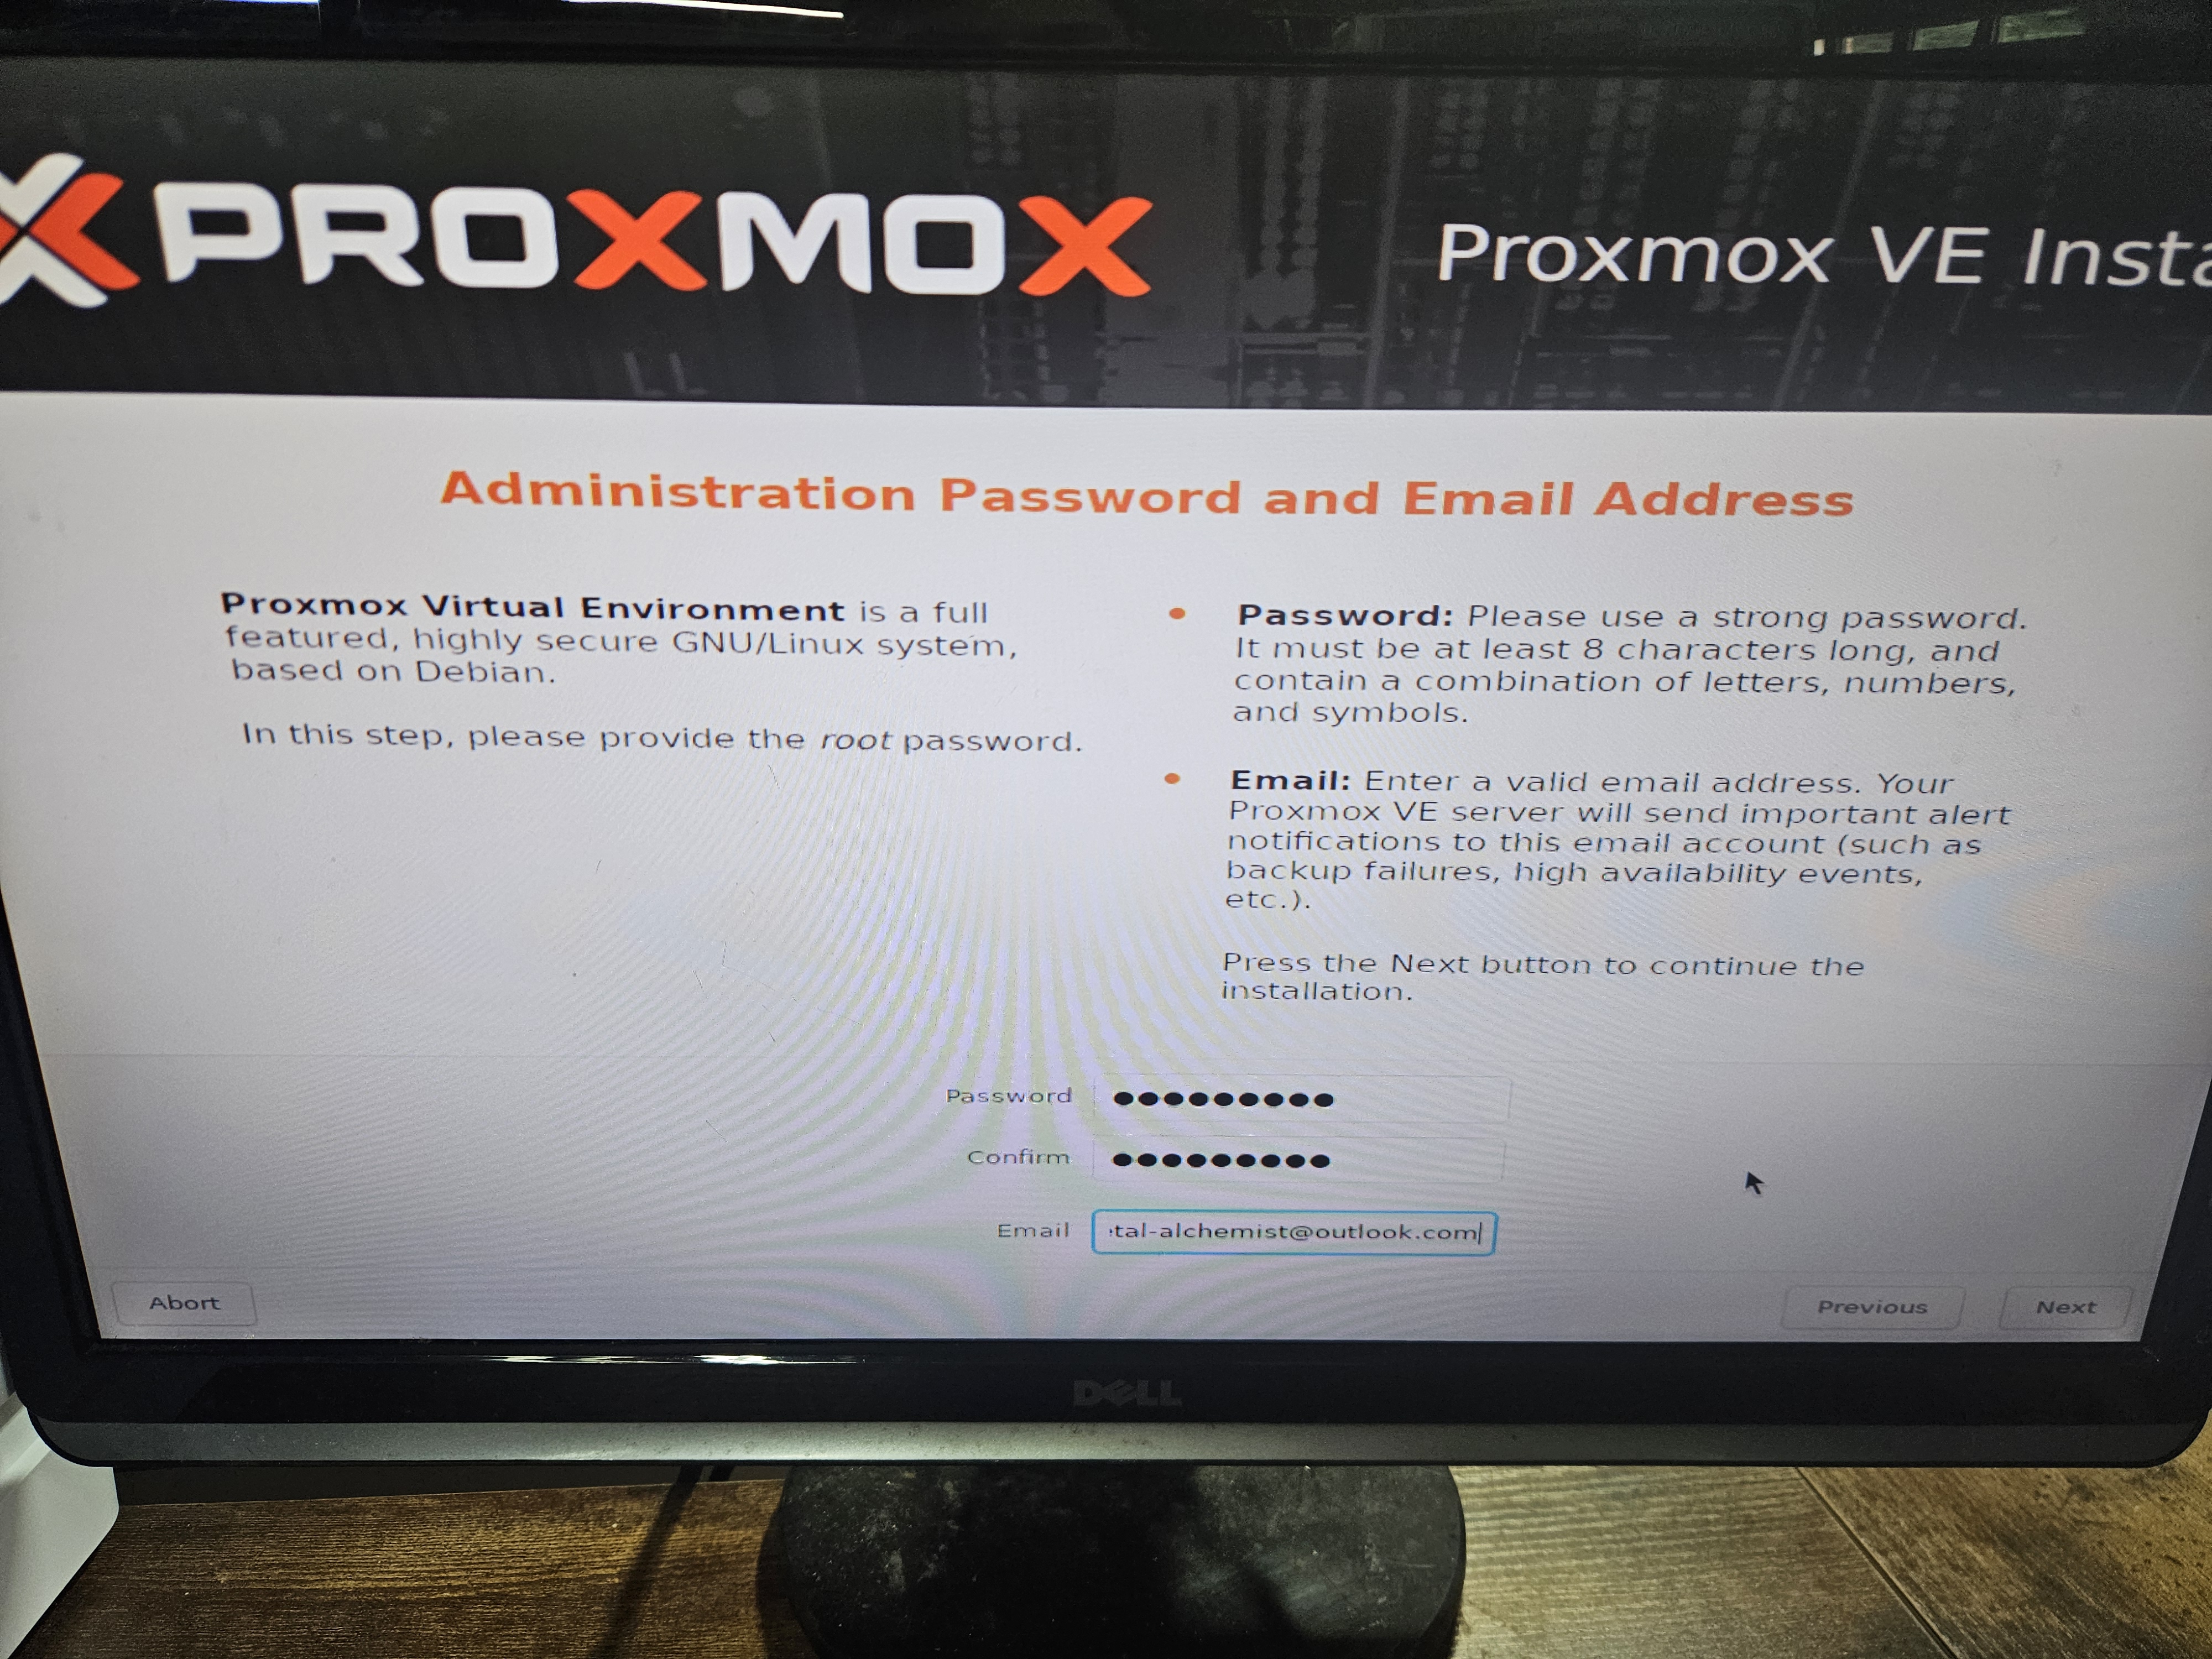
Password and email setup
Next, we move to the networking section where you will pick your IP addresses and select the NIC (Network Interface Card) you want to connect to your network. In my case, I have both nic0 (ethernet) and nic1 (wireless). Since this computer is connected over ethernet, we will select nic0.
The next step is to create a hostname (FQDN). This name can be whatever you want, but make sure it ends in a domain suffix. Proxmox requires the hostname to be in FQDN (Fully Qualified Domain Name) format — just like a website ends in .com or .org, your hostname should end in a structured format. I went with .home since it won't be used for a public internet domain. For the IP address, we follow CIDR notation. Most basic home networks reserve the first 24 bits, giving us 254 usable IP addresses. If you have many users and IoT devices, you may need to adjust from /24 to /16. Input a 192.168.1.x address that is not currently in use — check your router for a list of active IPs. It is also a good idea at this point to reserve that IP address in your router so you don't run into address conflicts later. If you have a specific gateway or DNS server, input those IPs now. For a simple lab, 192.168.1.1 works fine for both. We will fine-tune security later once we get to firewalls.
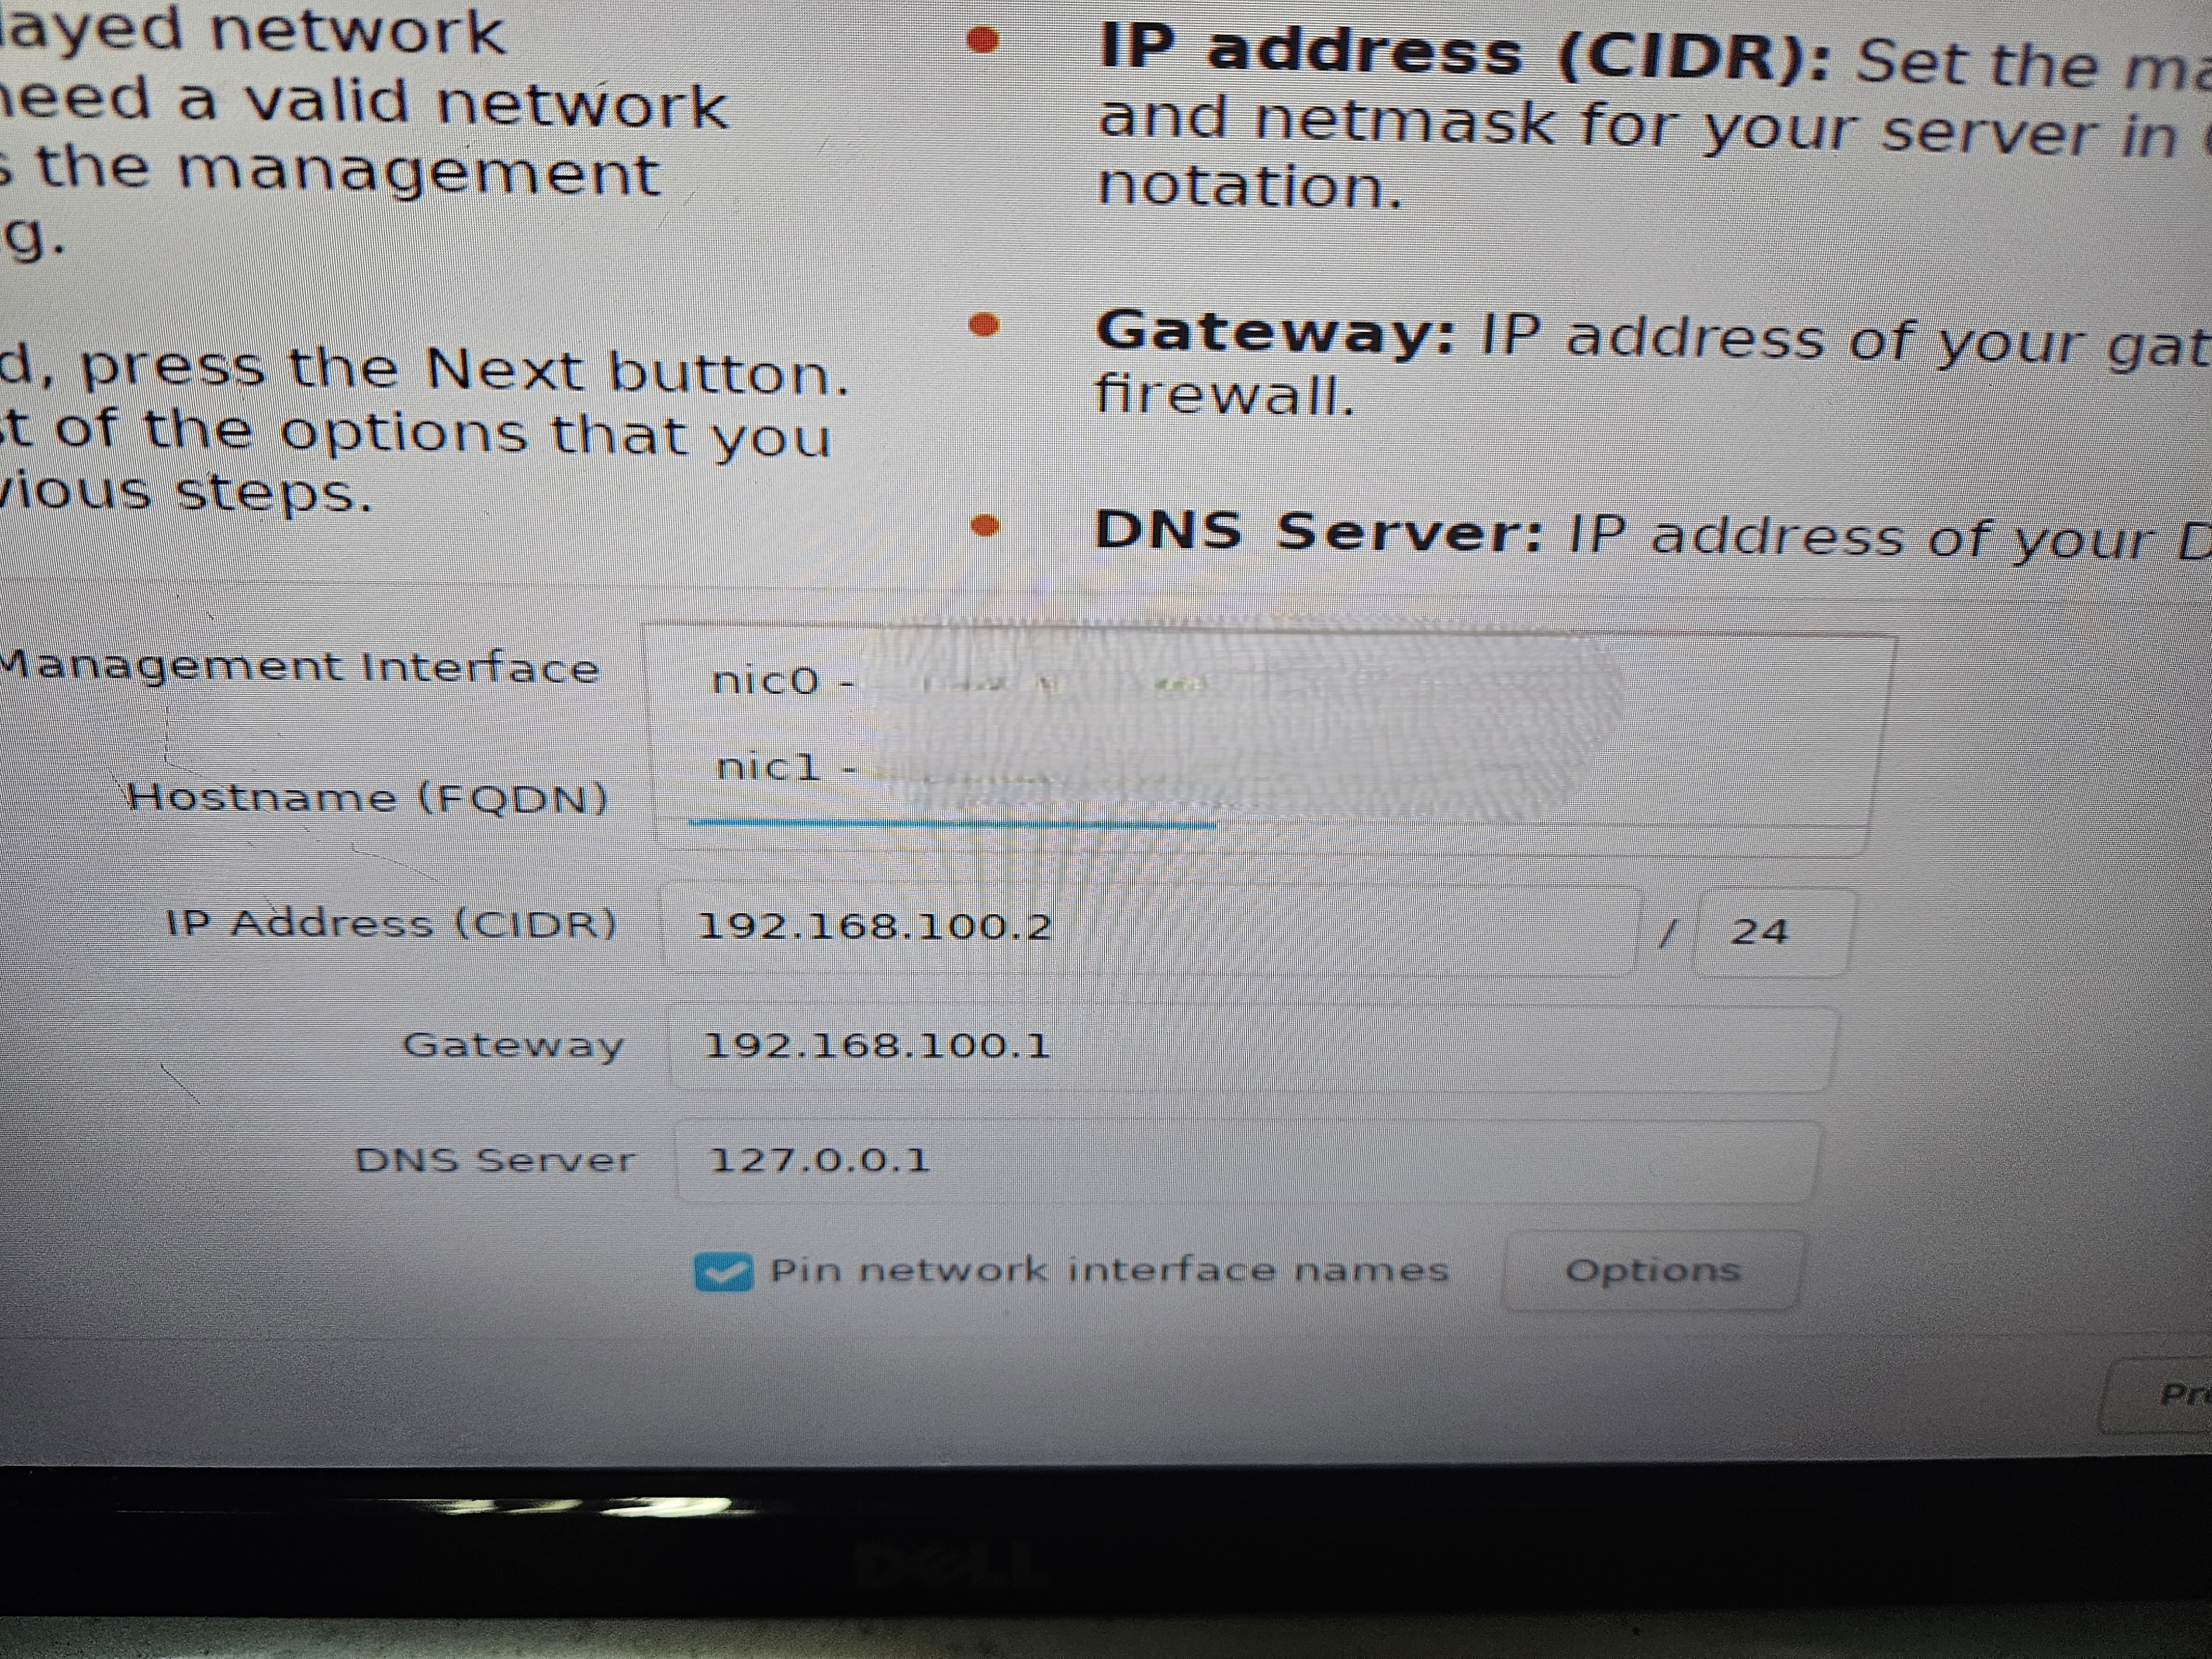
Network information — default
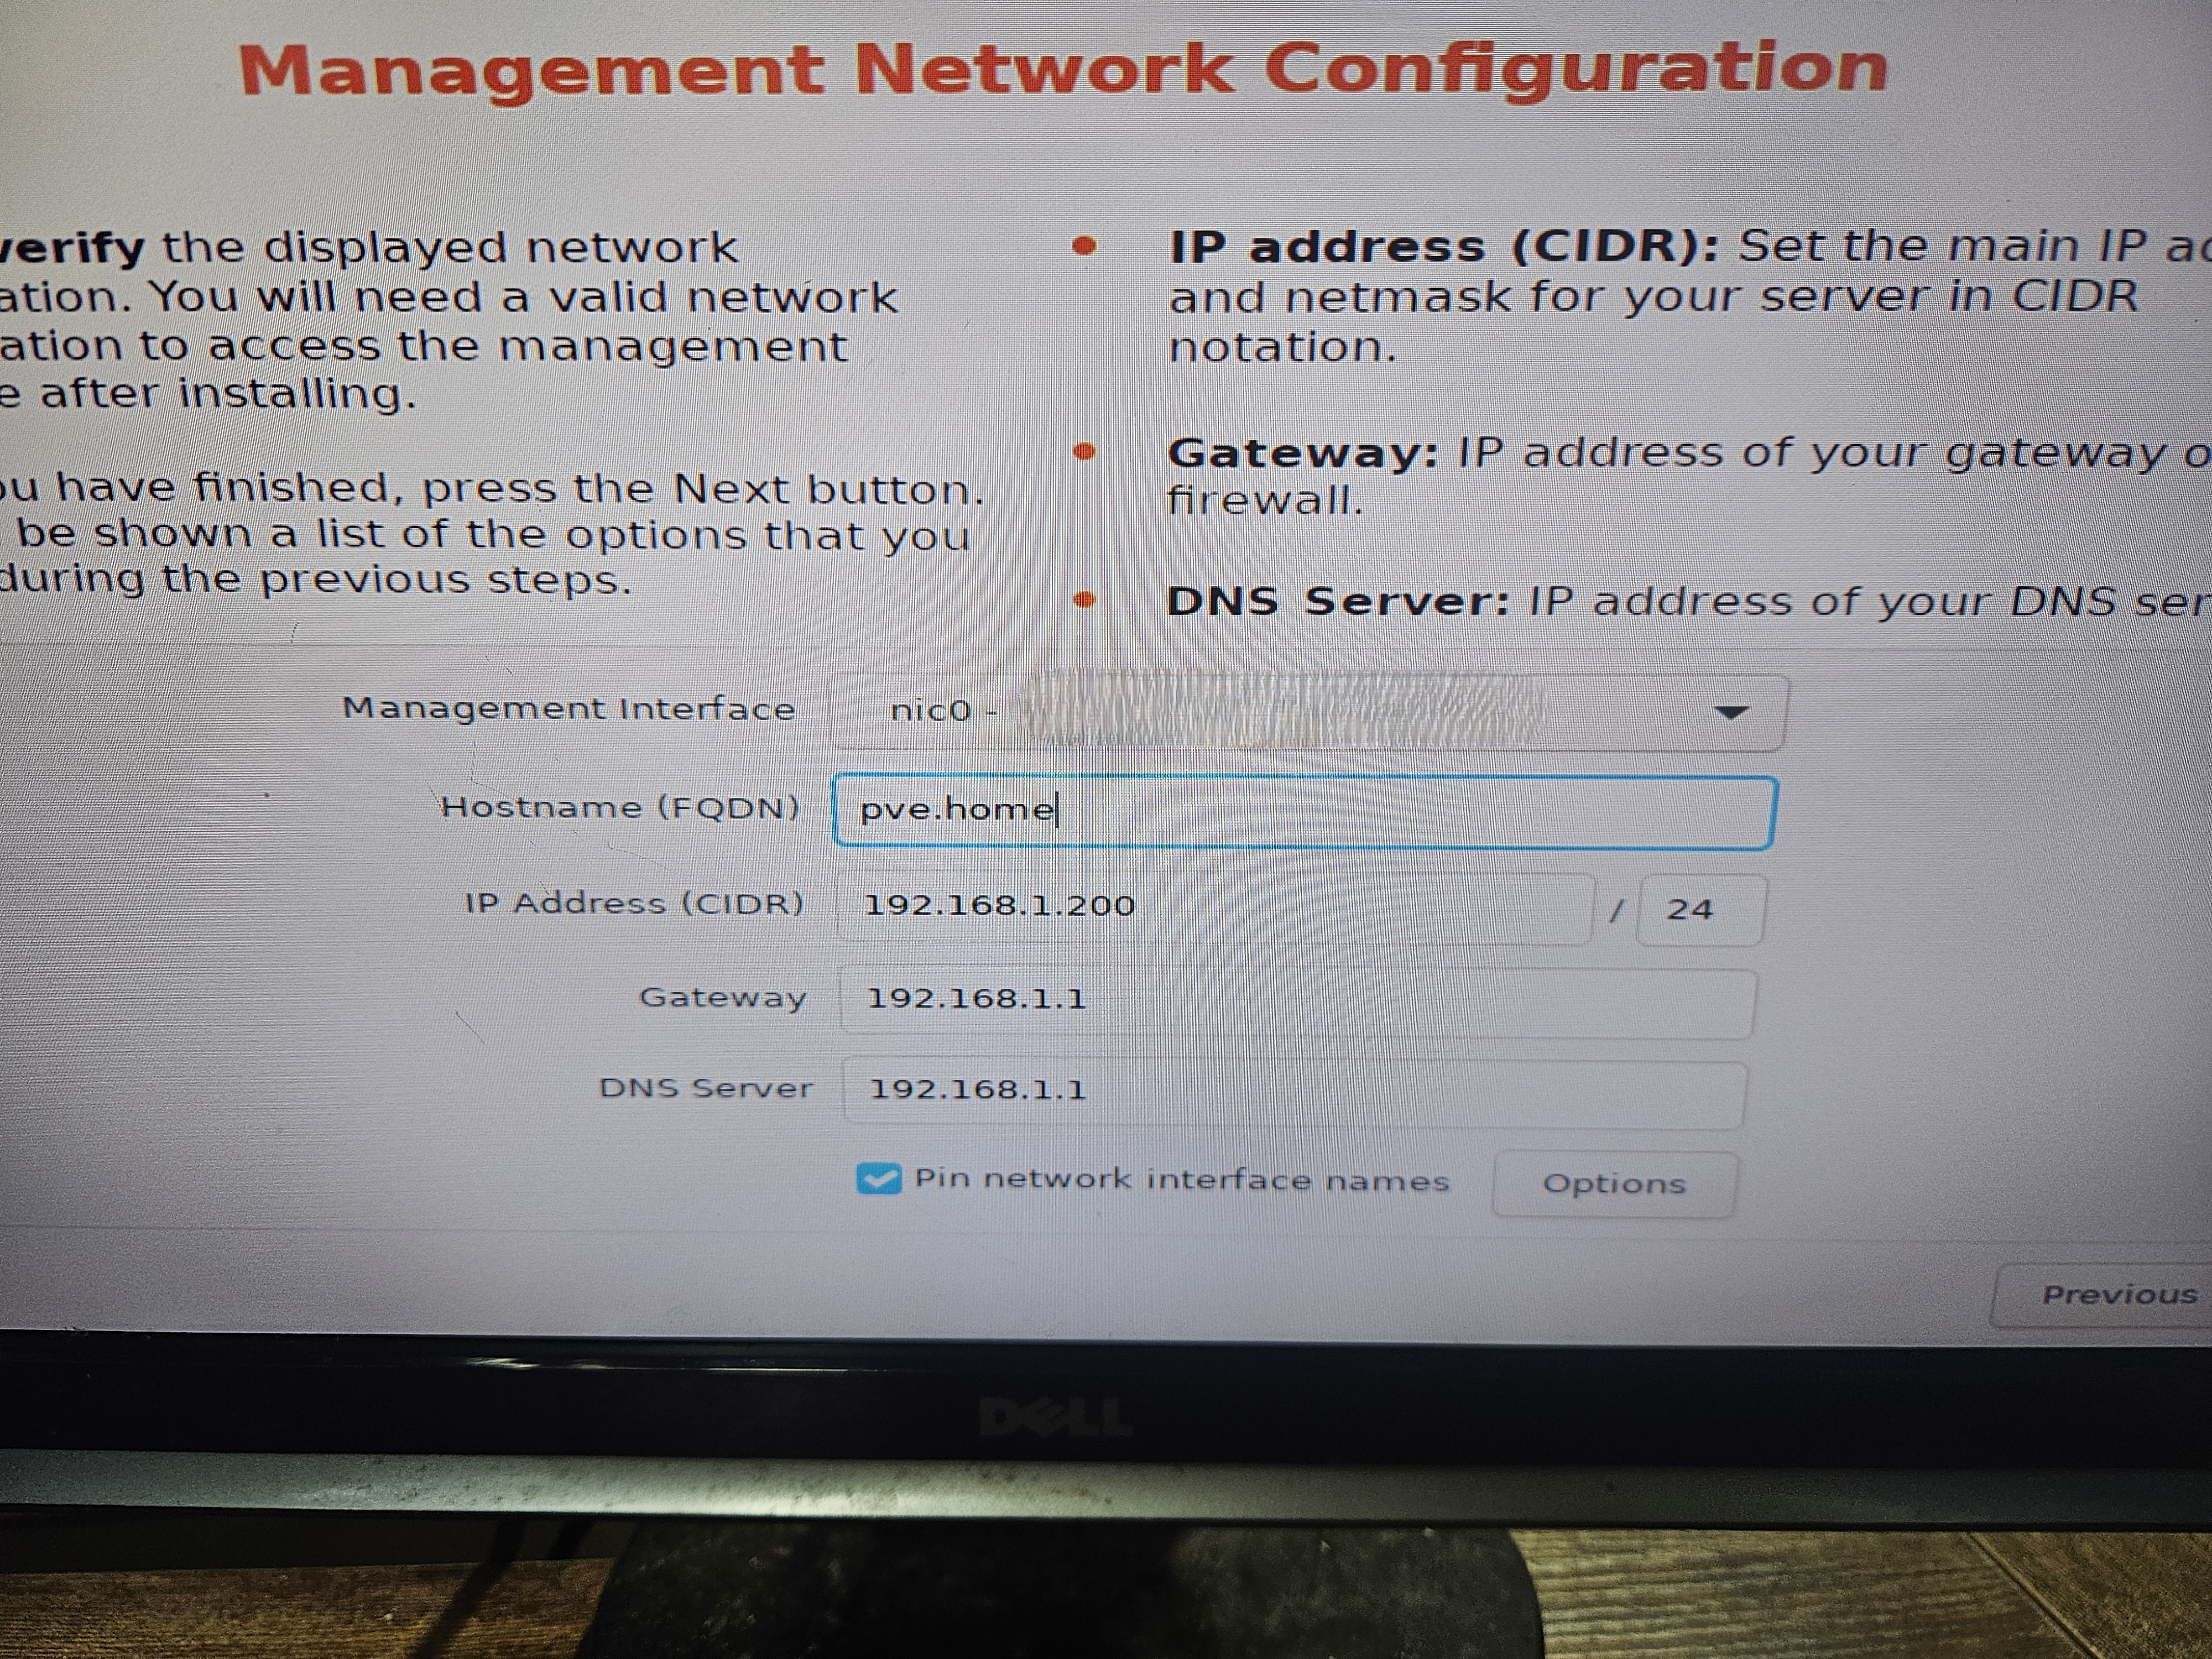
Network information — modified
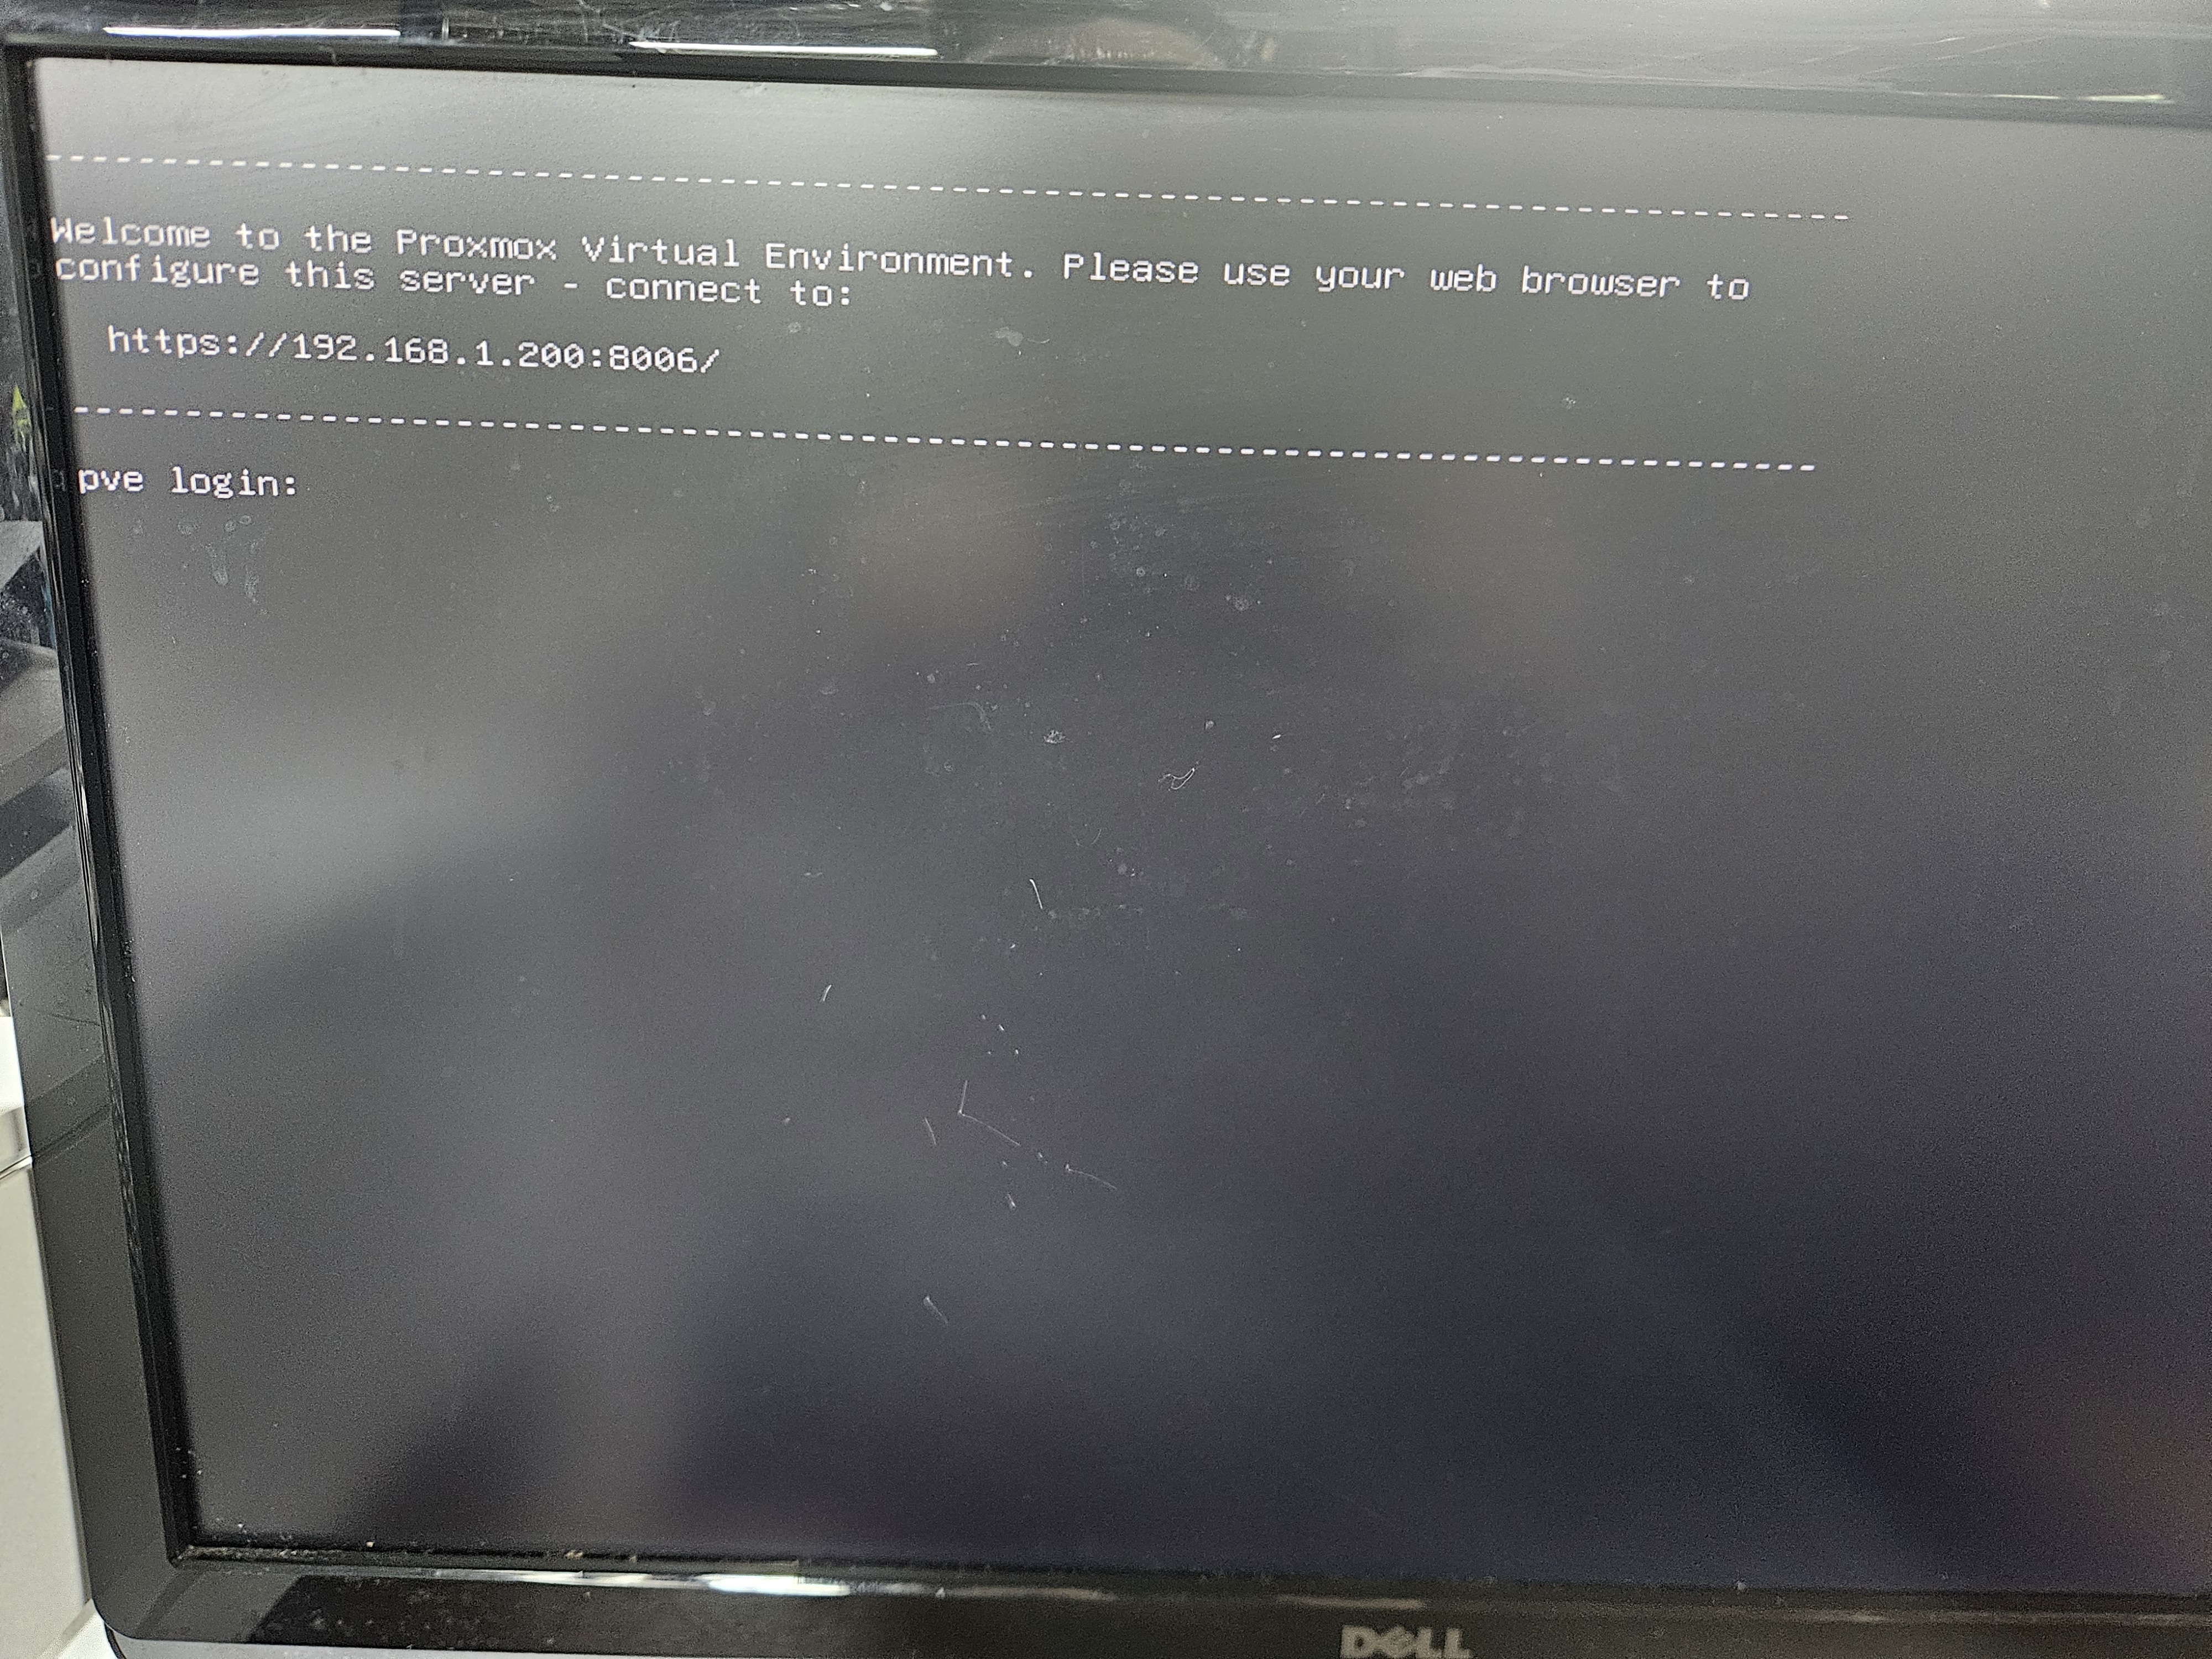
Once everything is set, click Next until the installation begins. Once complete, it should look like the picture below. We are now done working directly on the Proxmox host machine and will use another desktop or laptop to access it from a web browser.
Installation complete
Quality of Life Tools
There are some useful commands that can help you monitor logs on the Proxmox machine while setting up accounts and for general security purposes. At this stage, the machine hosting Proxmox does not need a monitor, keyboard, or mouse — you can just turn it on and it will start. However, I like to keep at least one monitor on the Proxmox machine. One command that helps with IP and connectivity issues is ip addr. This command lets you see which NICs are active and whether they are up or down. In my case, I had grabbed an old spare ethernet cable to connect Proxmox to my local network, which caused connectivity issues. ip addr showed me that the virtual interface was down and helped me correct the problem. Another useful command is journalctl -f. Journalctl is a useful tool for viewing system logs on Linux and is included in Proxmox. The -f flag streams new log entries in real time. This has been a big help for monitoring account login attempts and will be especially useful later when we get to malware analysis. Each failed login attempt appears in bright red text — hard to miss!
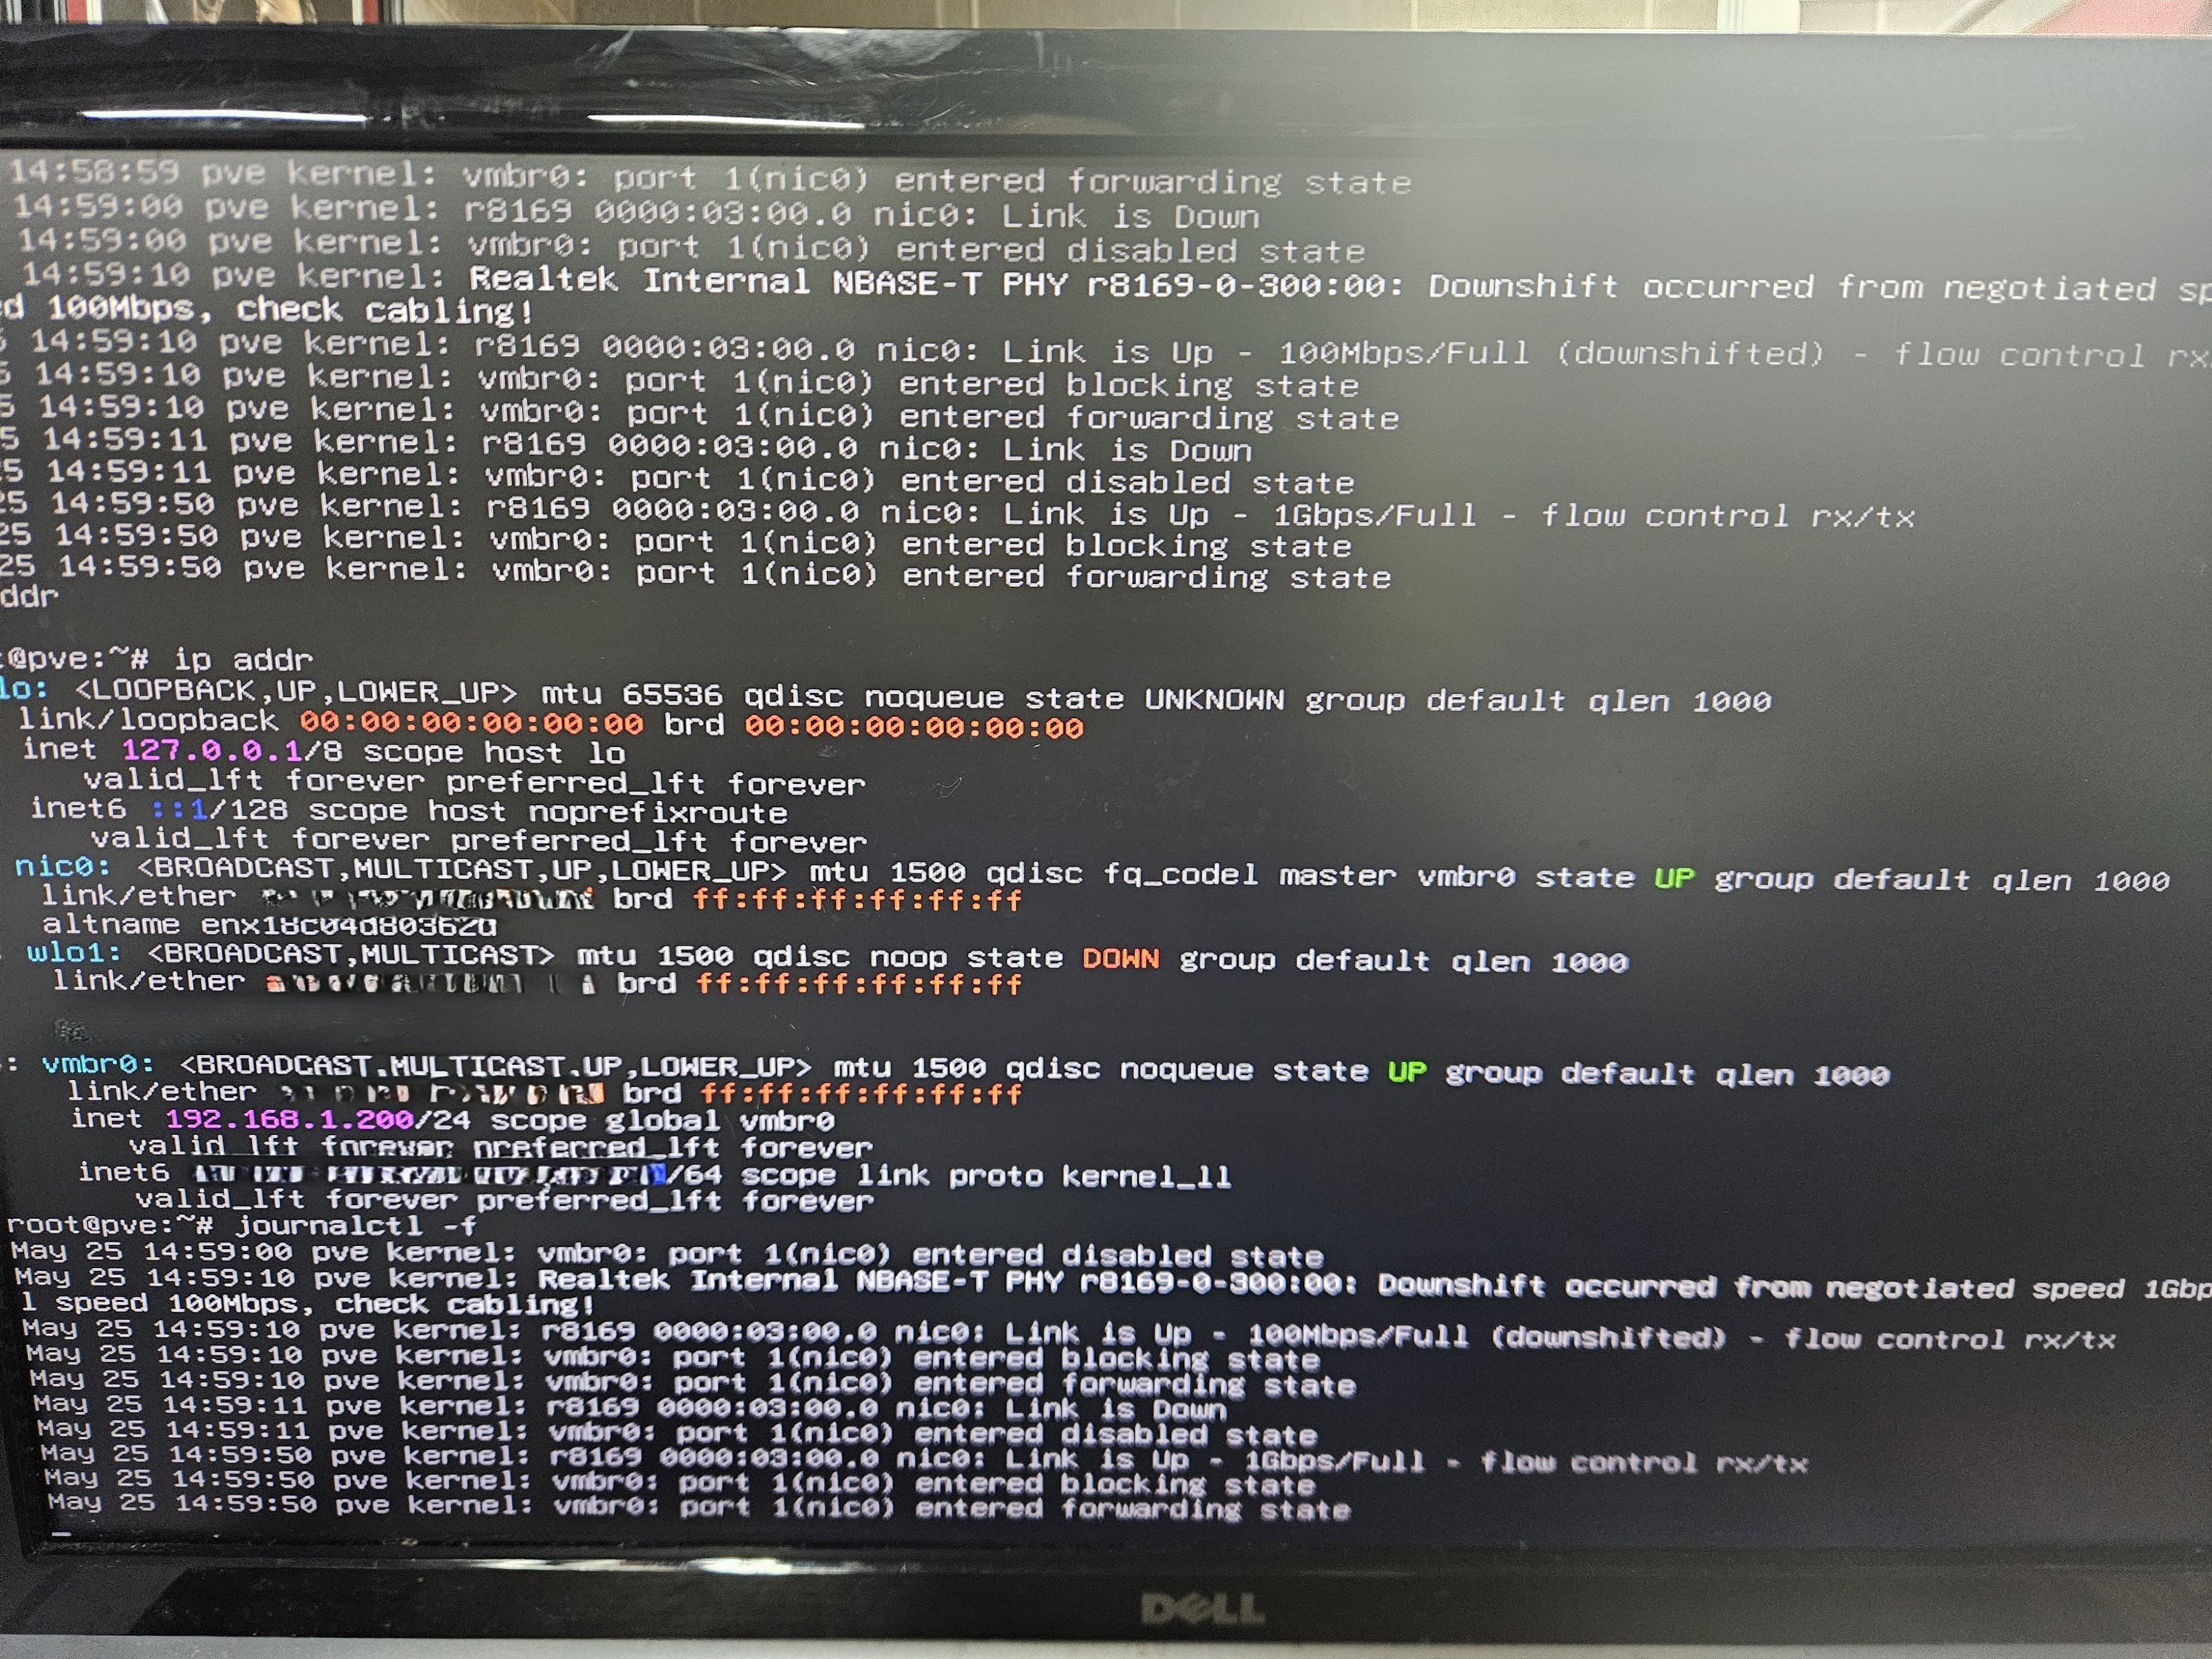
ip addr and journalctl in use
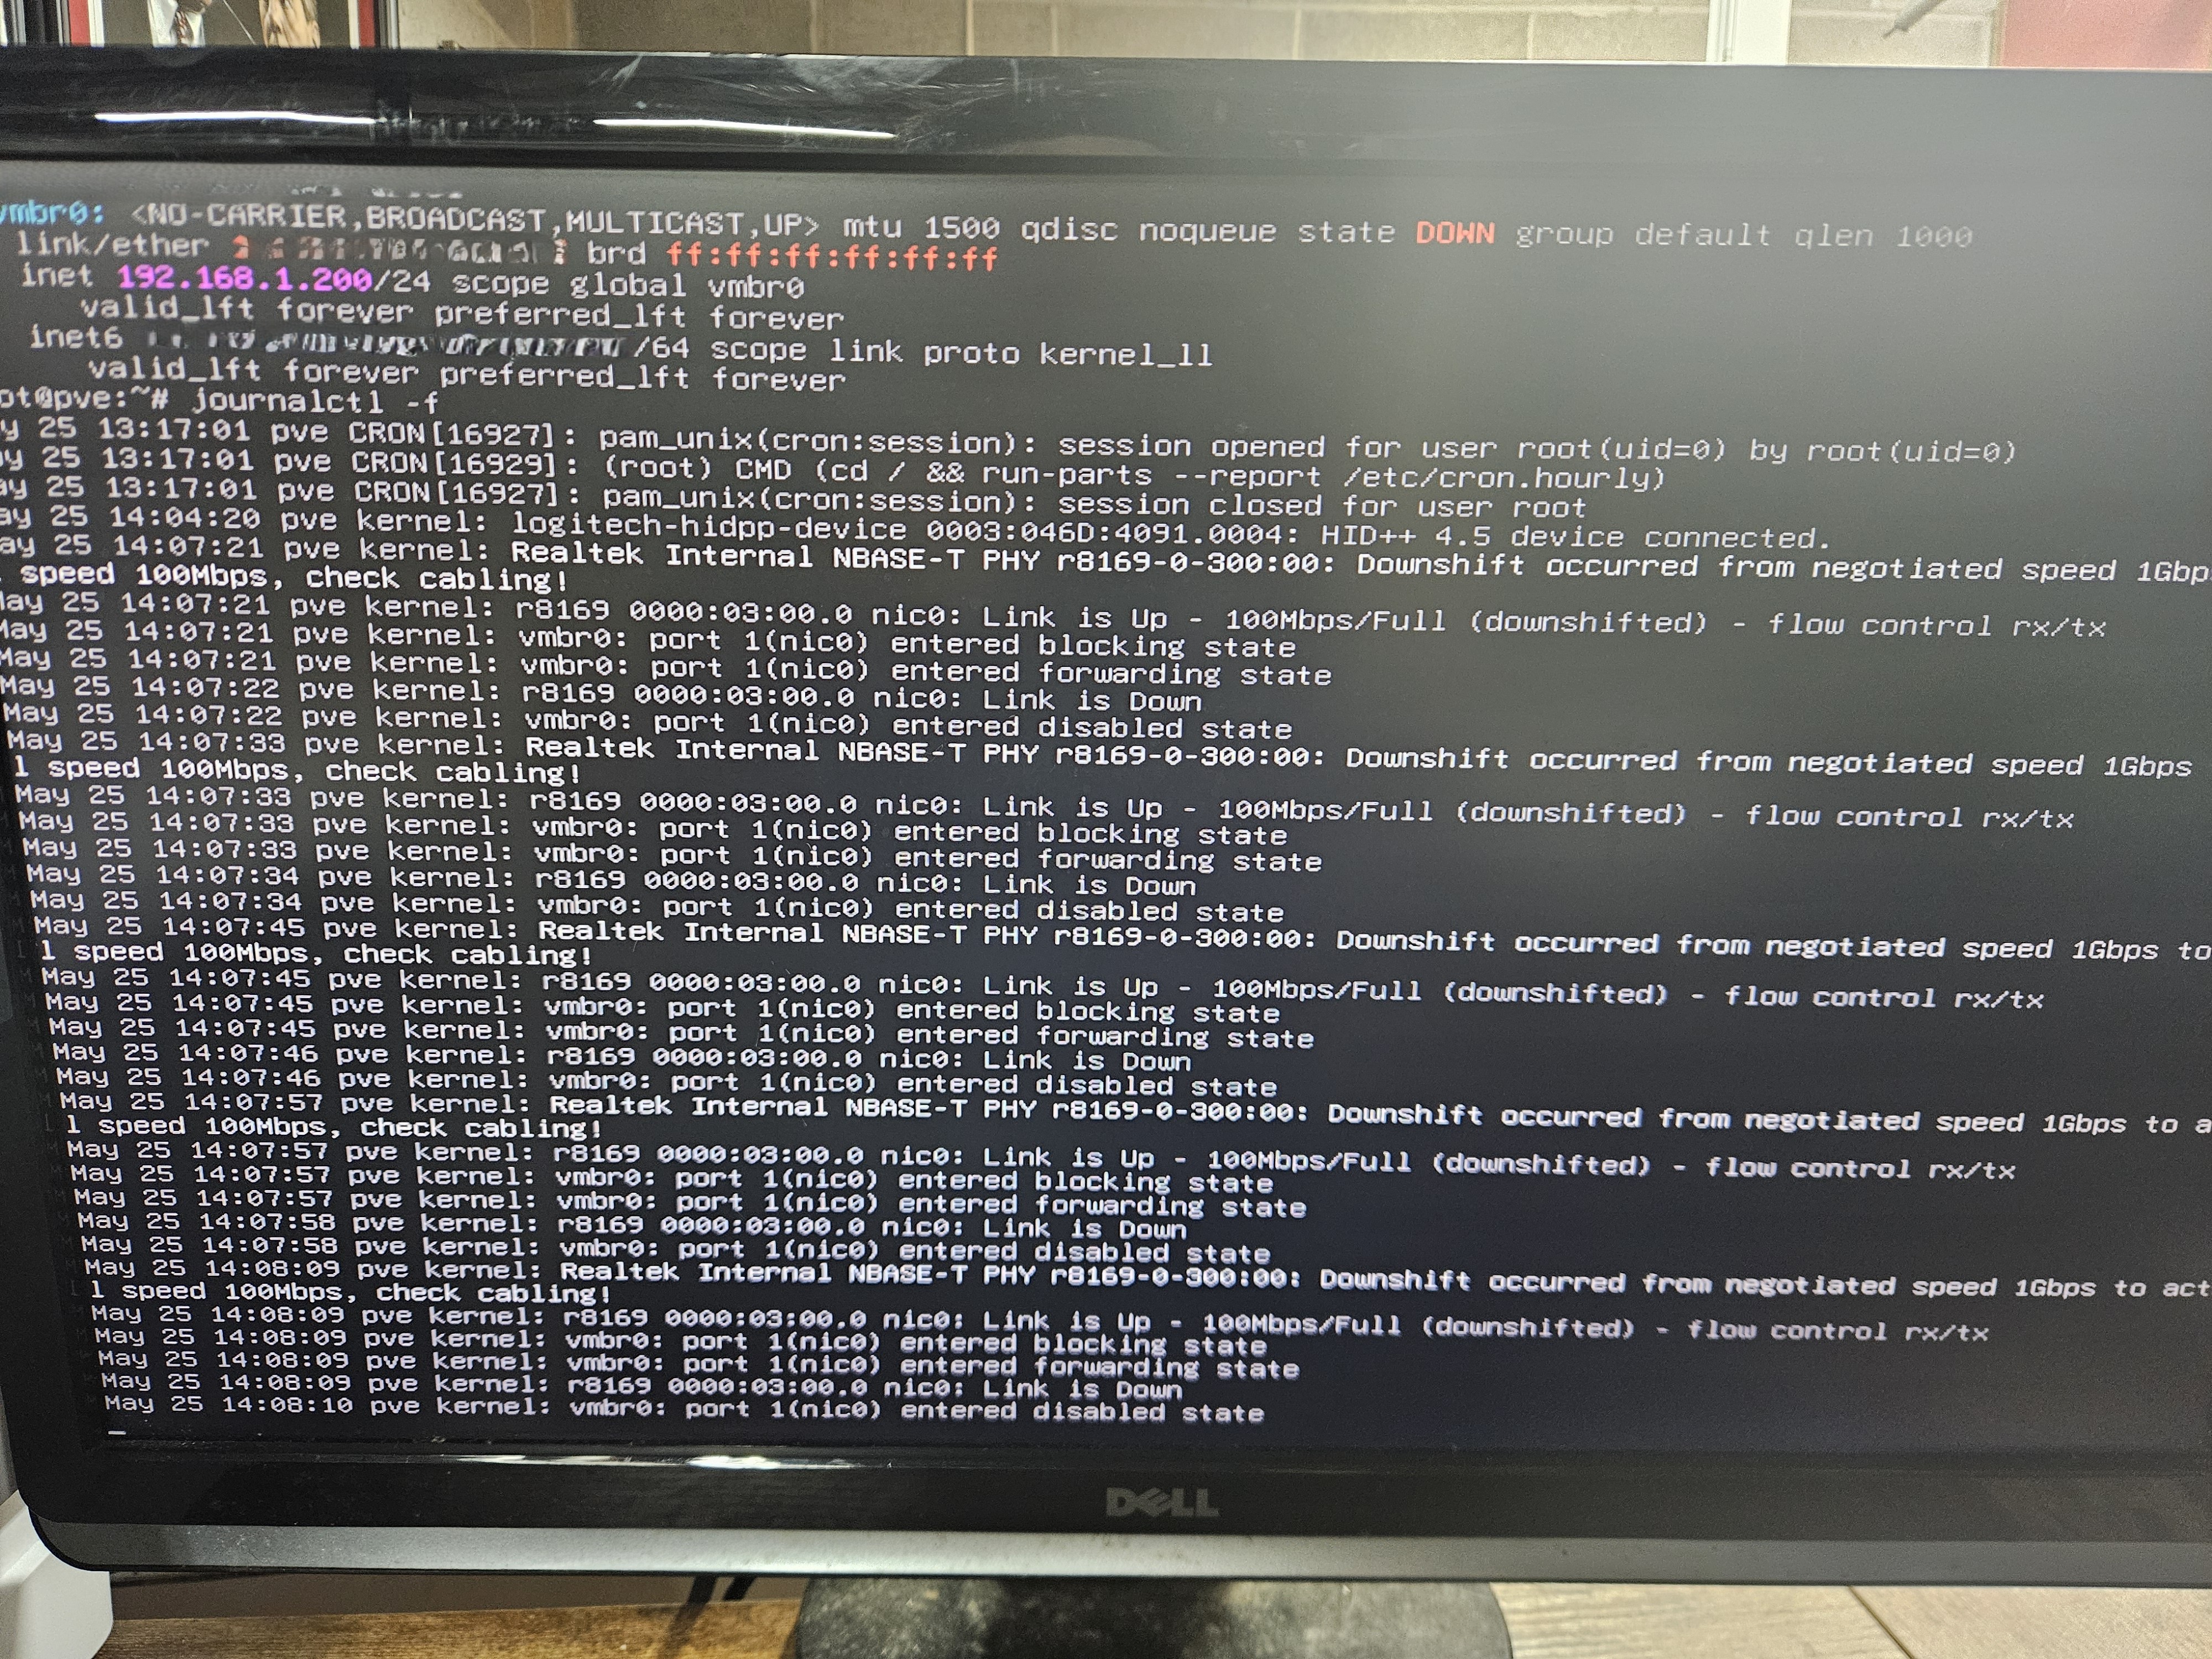
ip addr and journalctl output
Setup
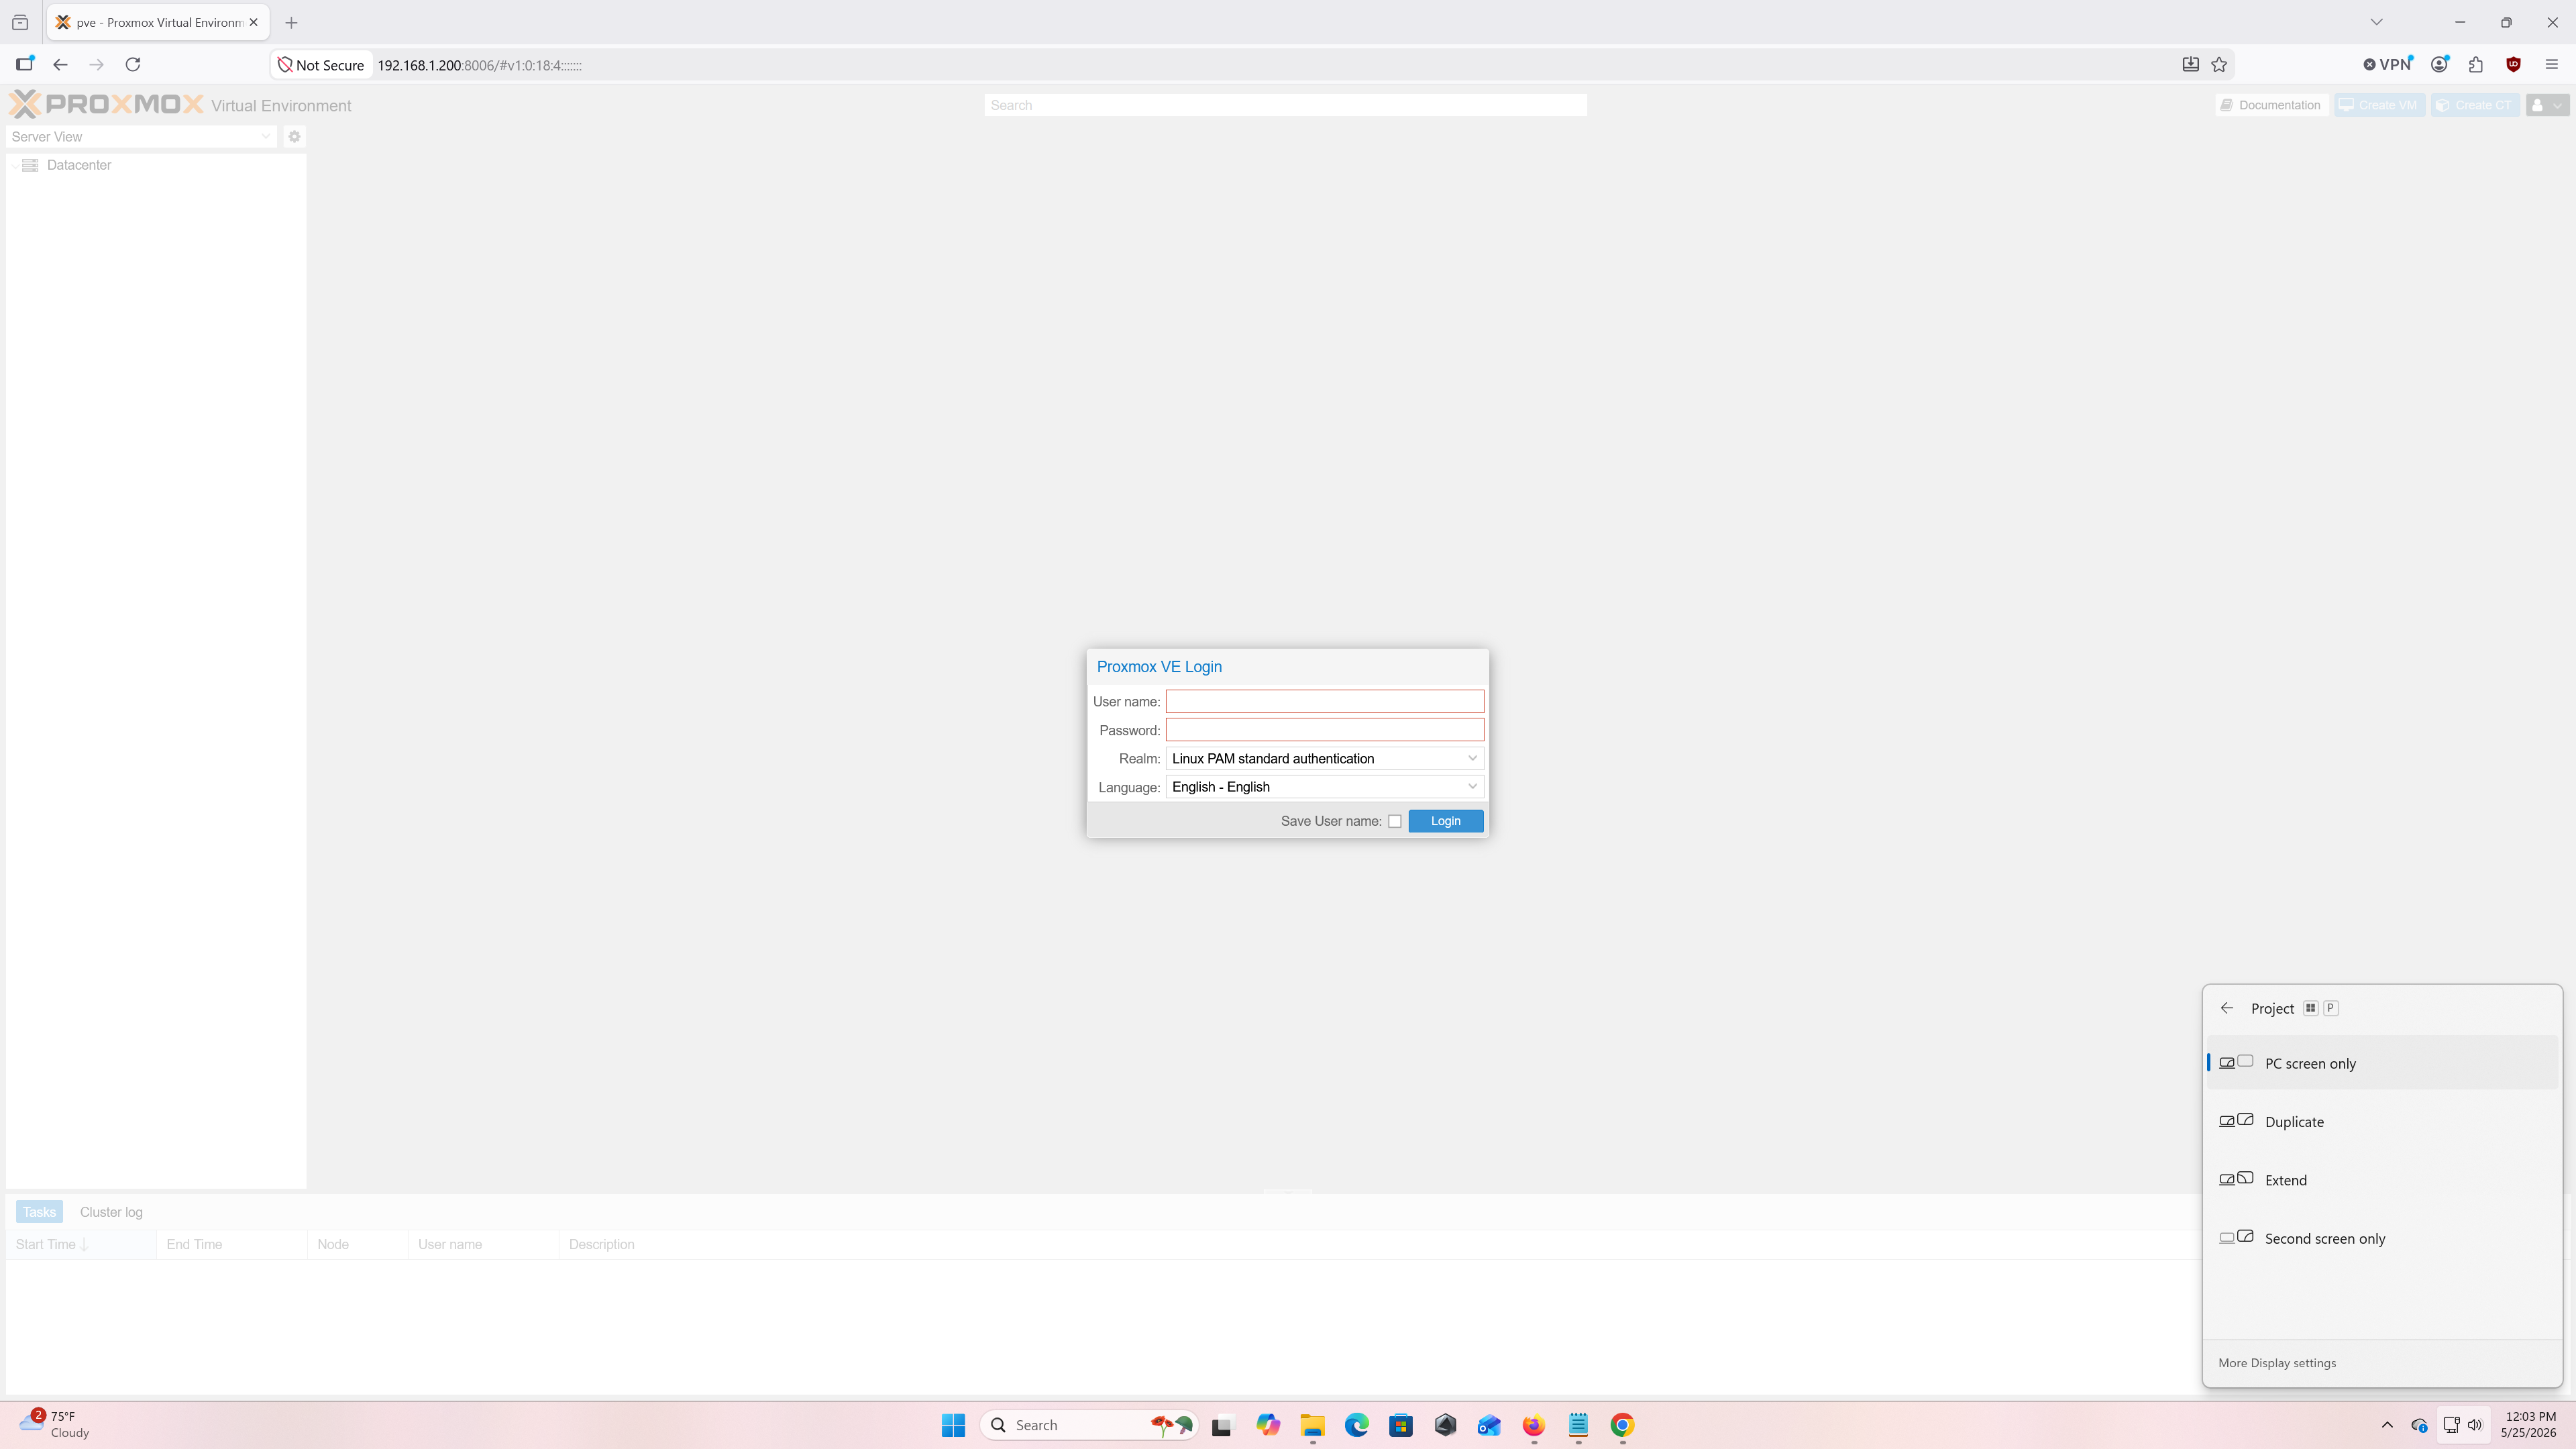
Now that Proxmox is installed, we can move on to setup. On another desktop or laptop, navigate to the address you chose during installation — you will also see it printed on the Proxmox welcome screen. At the end of your IP address you will see a colon followed by 8006. Do not forget the full address including the colon and port number. Port 8006 tells the browser which port Proxmox is communicating on and is required. With the full address entered in your browser, you should see the login screen. Log in with the username root and the password you set during installation.
Proxmox login screen
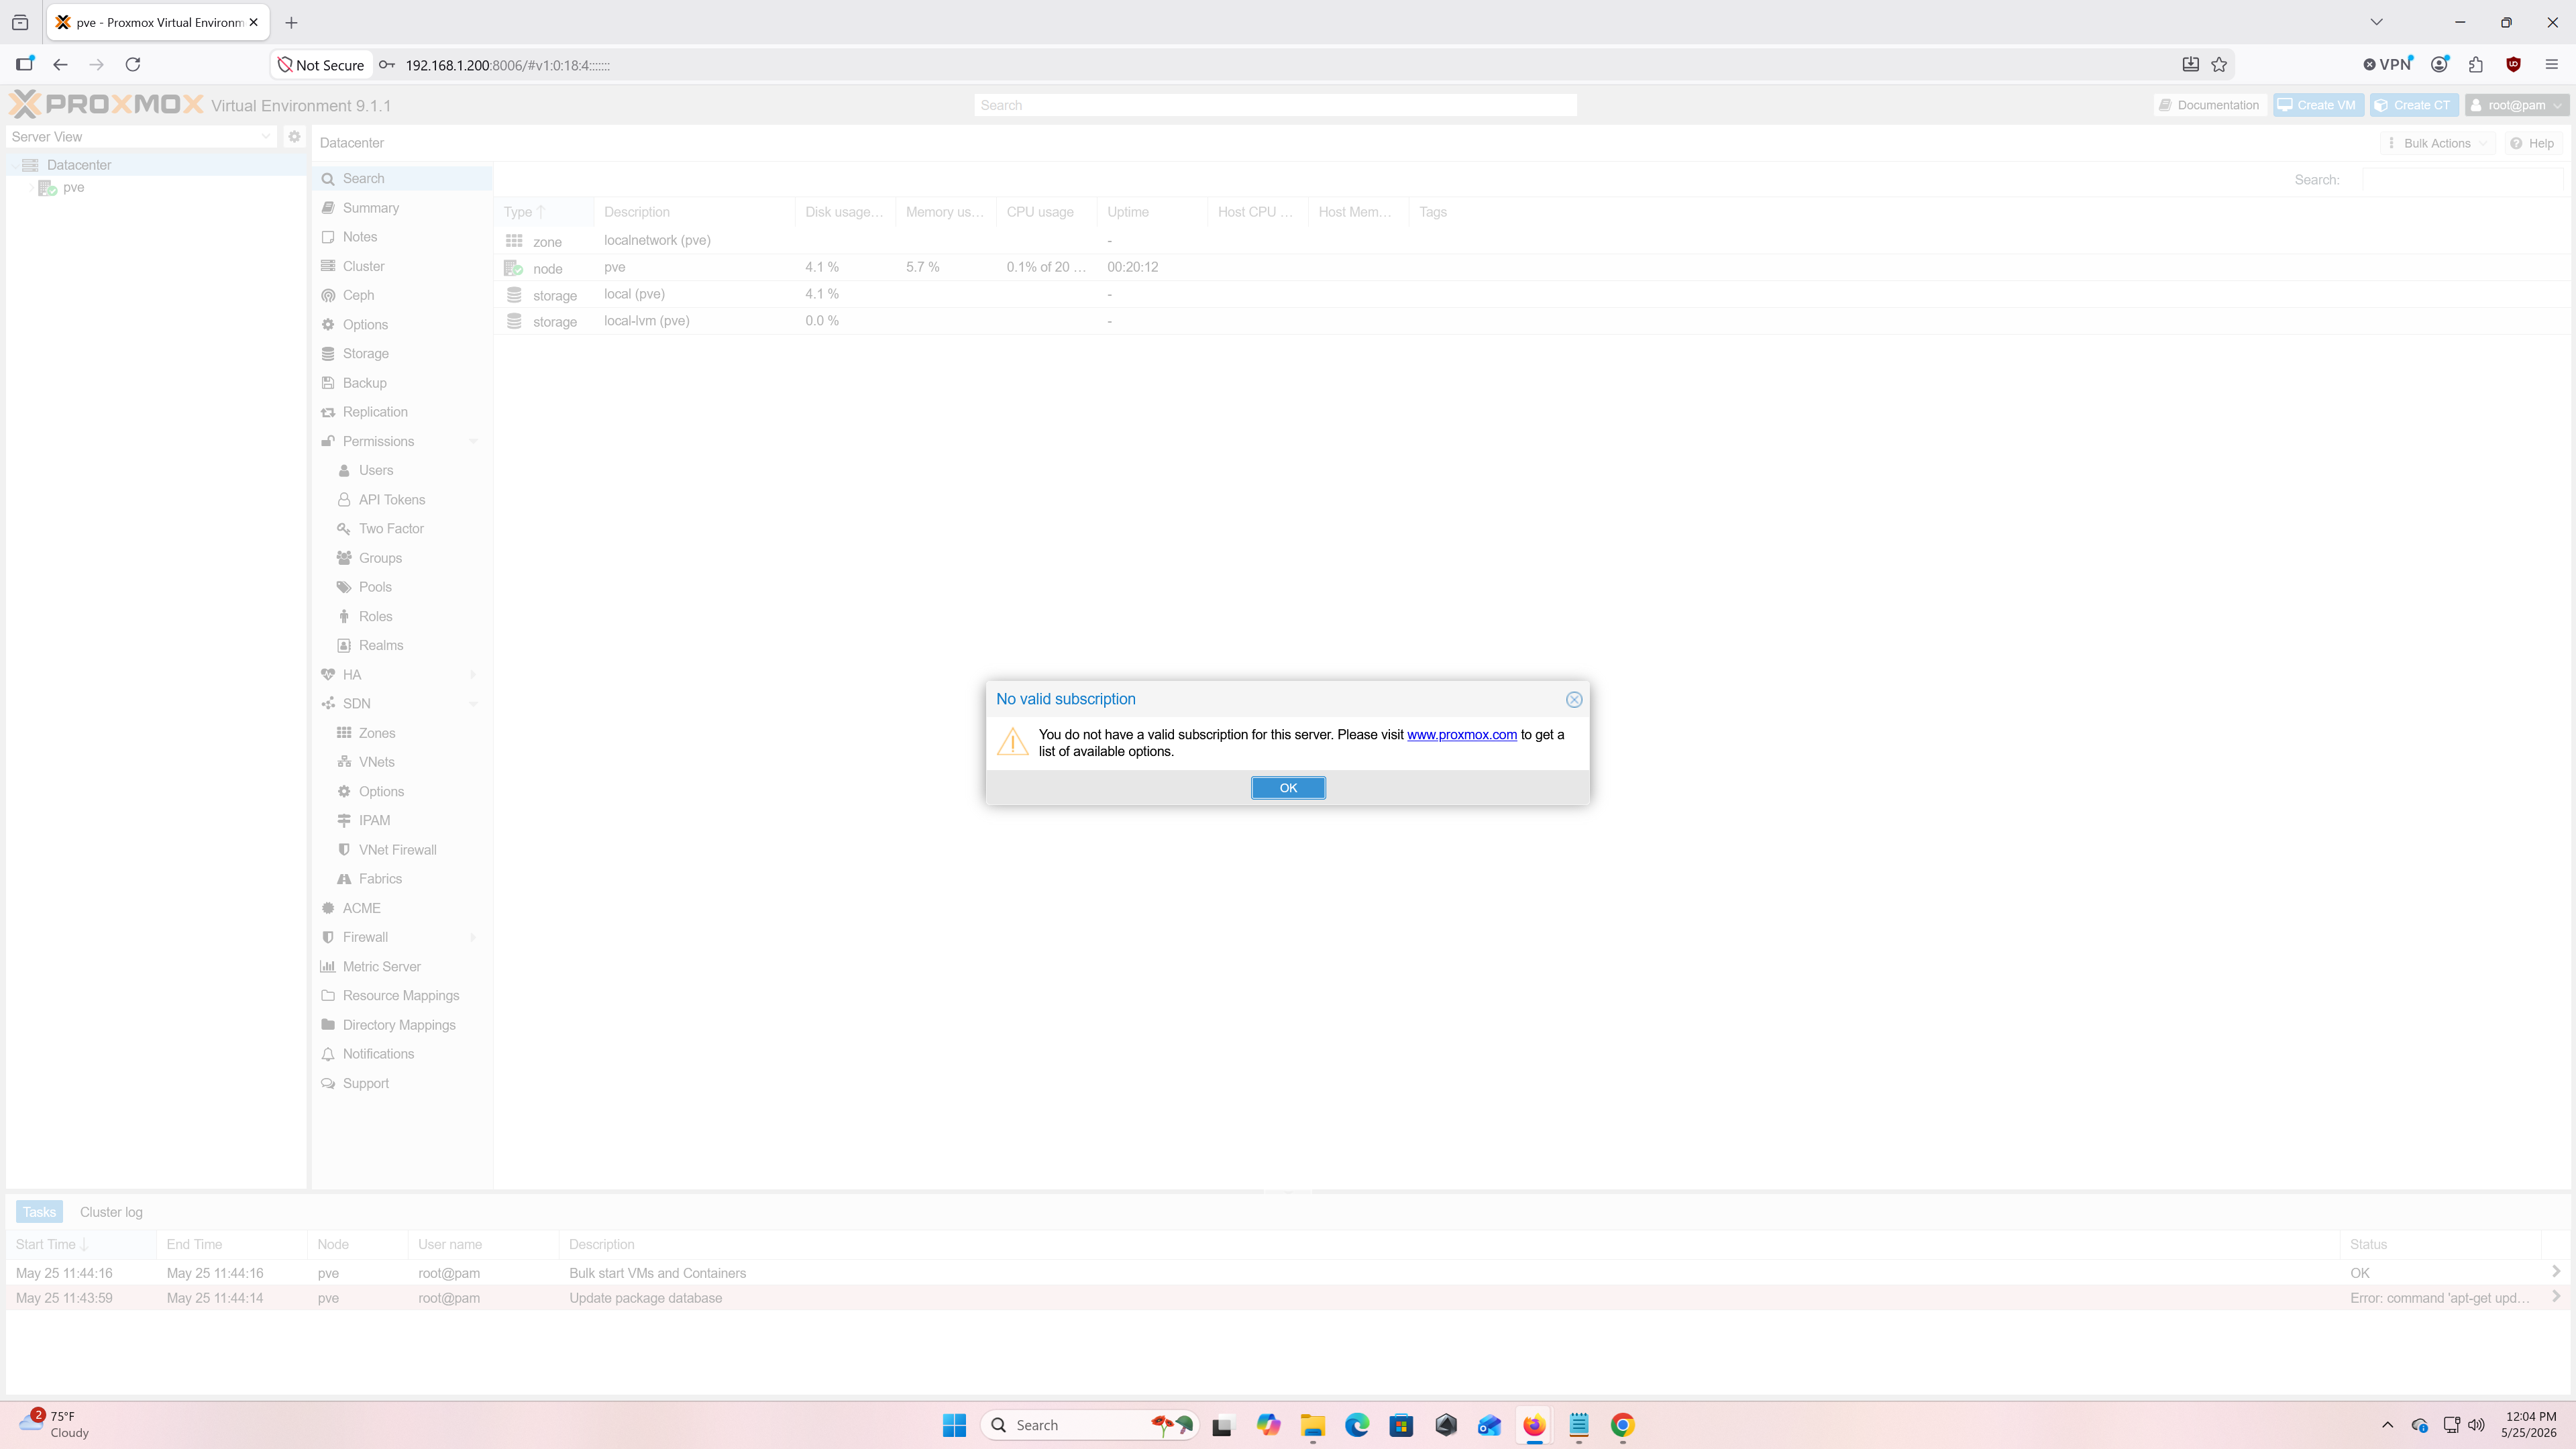
No subscription pop-up after successful login
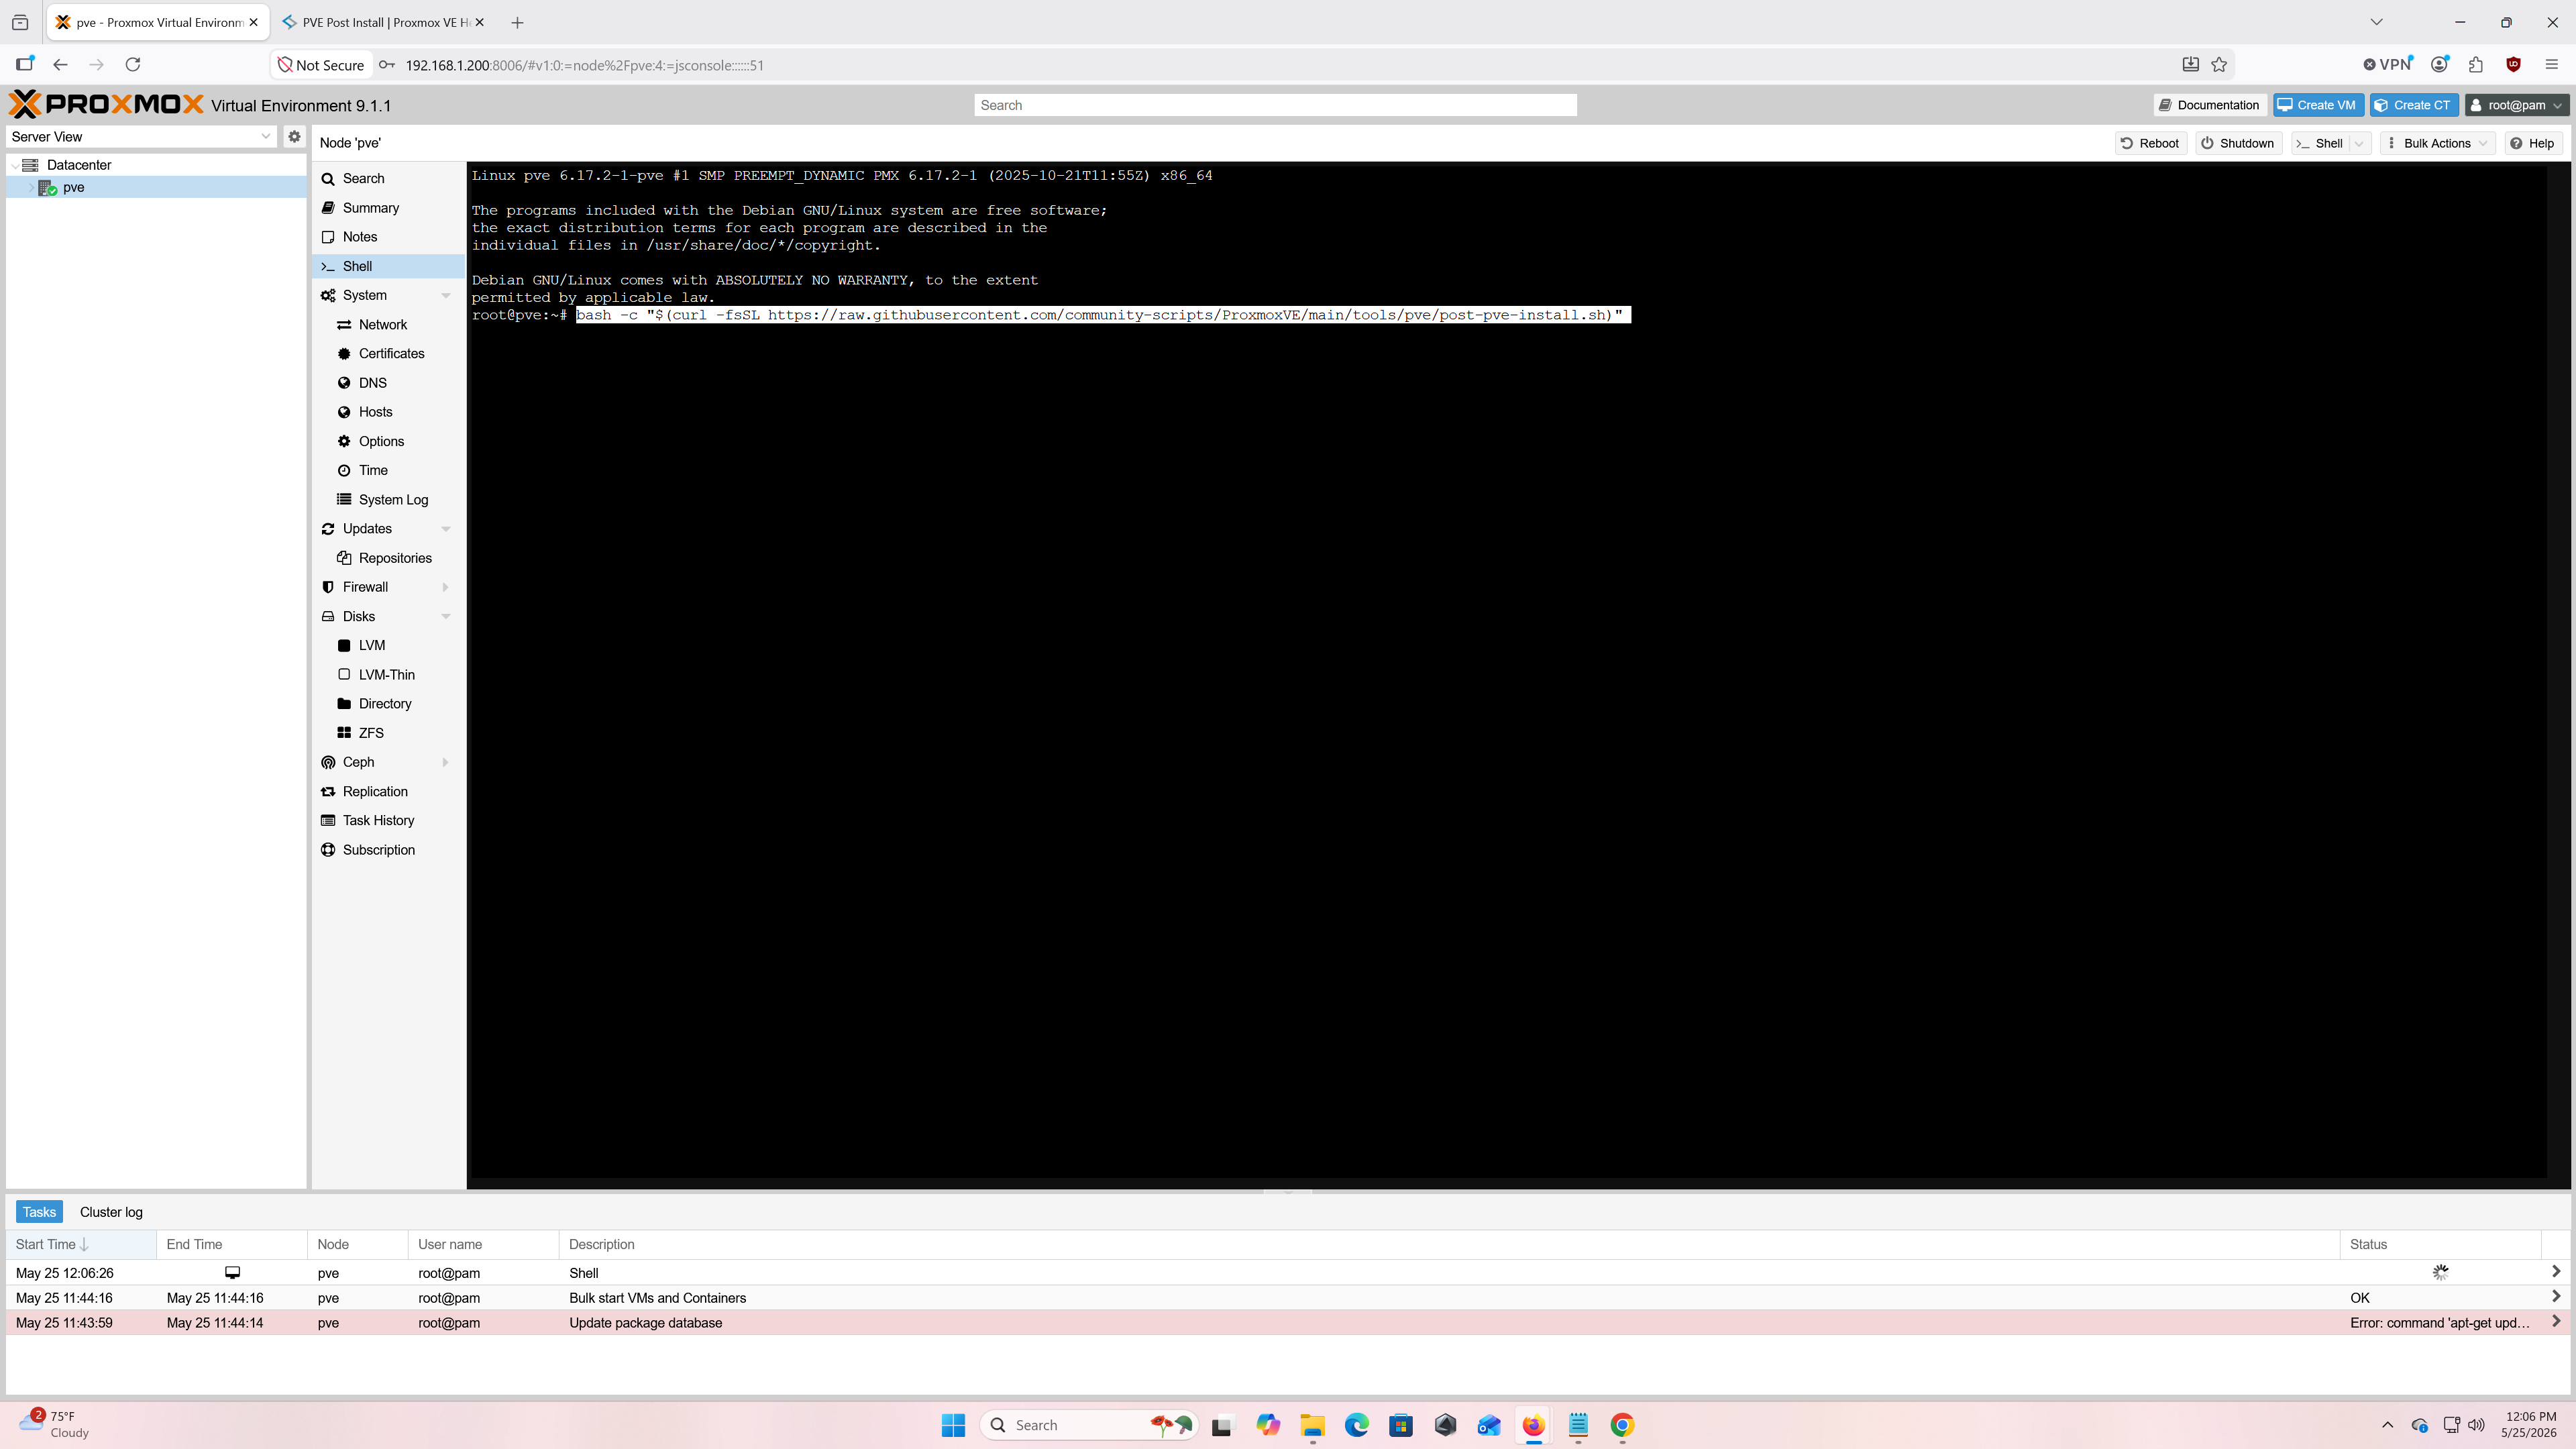
Once you log in successfully, you will be met by a No Valid Subscription pop-up. Go ahead and close it — we will address it in a moment. Navigate to a new browser tab and search for Proxmox VE Helper Scripts. Helper scripts are shell commands you can copy and run to perform common tasks like OS installation or, in our case, updating Proxmox and removing the subscription nag. Search for PVE Post Install and find the bash command in the install section. Copy that command and paste it into the Proxmox shell.
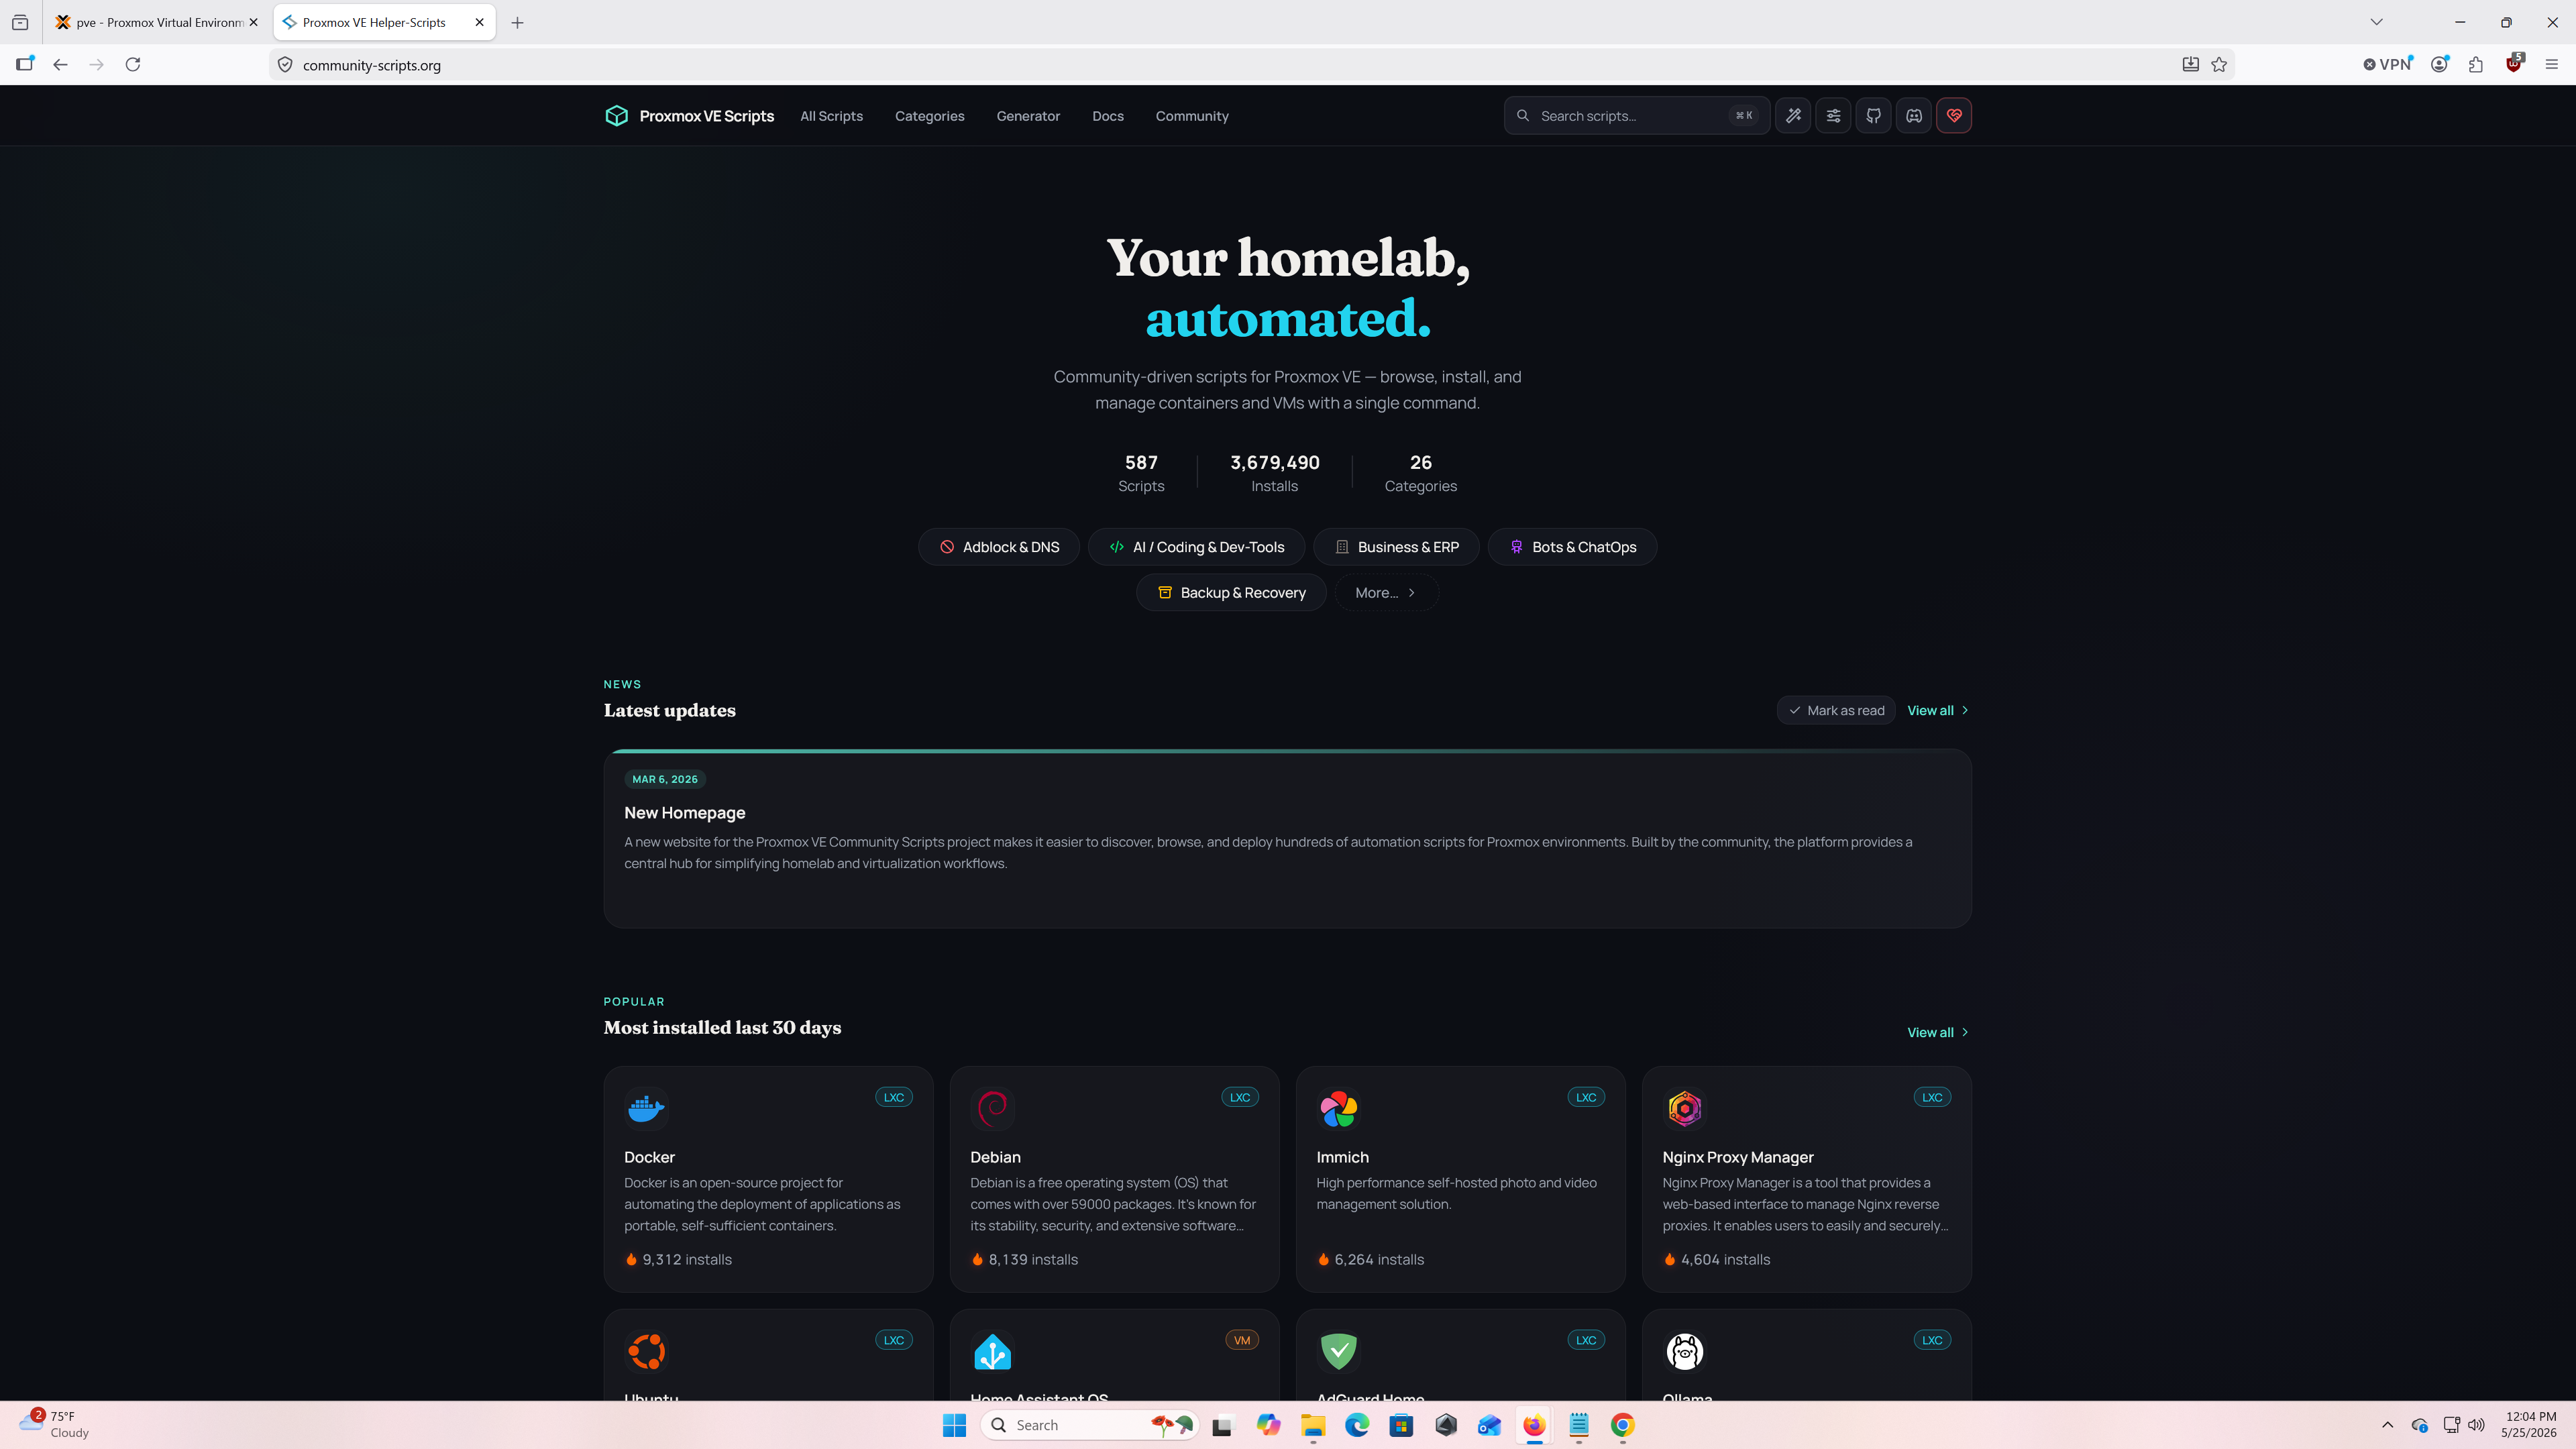
Proxmox helper scripts page
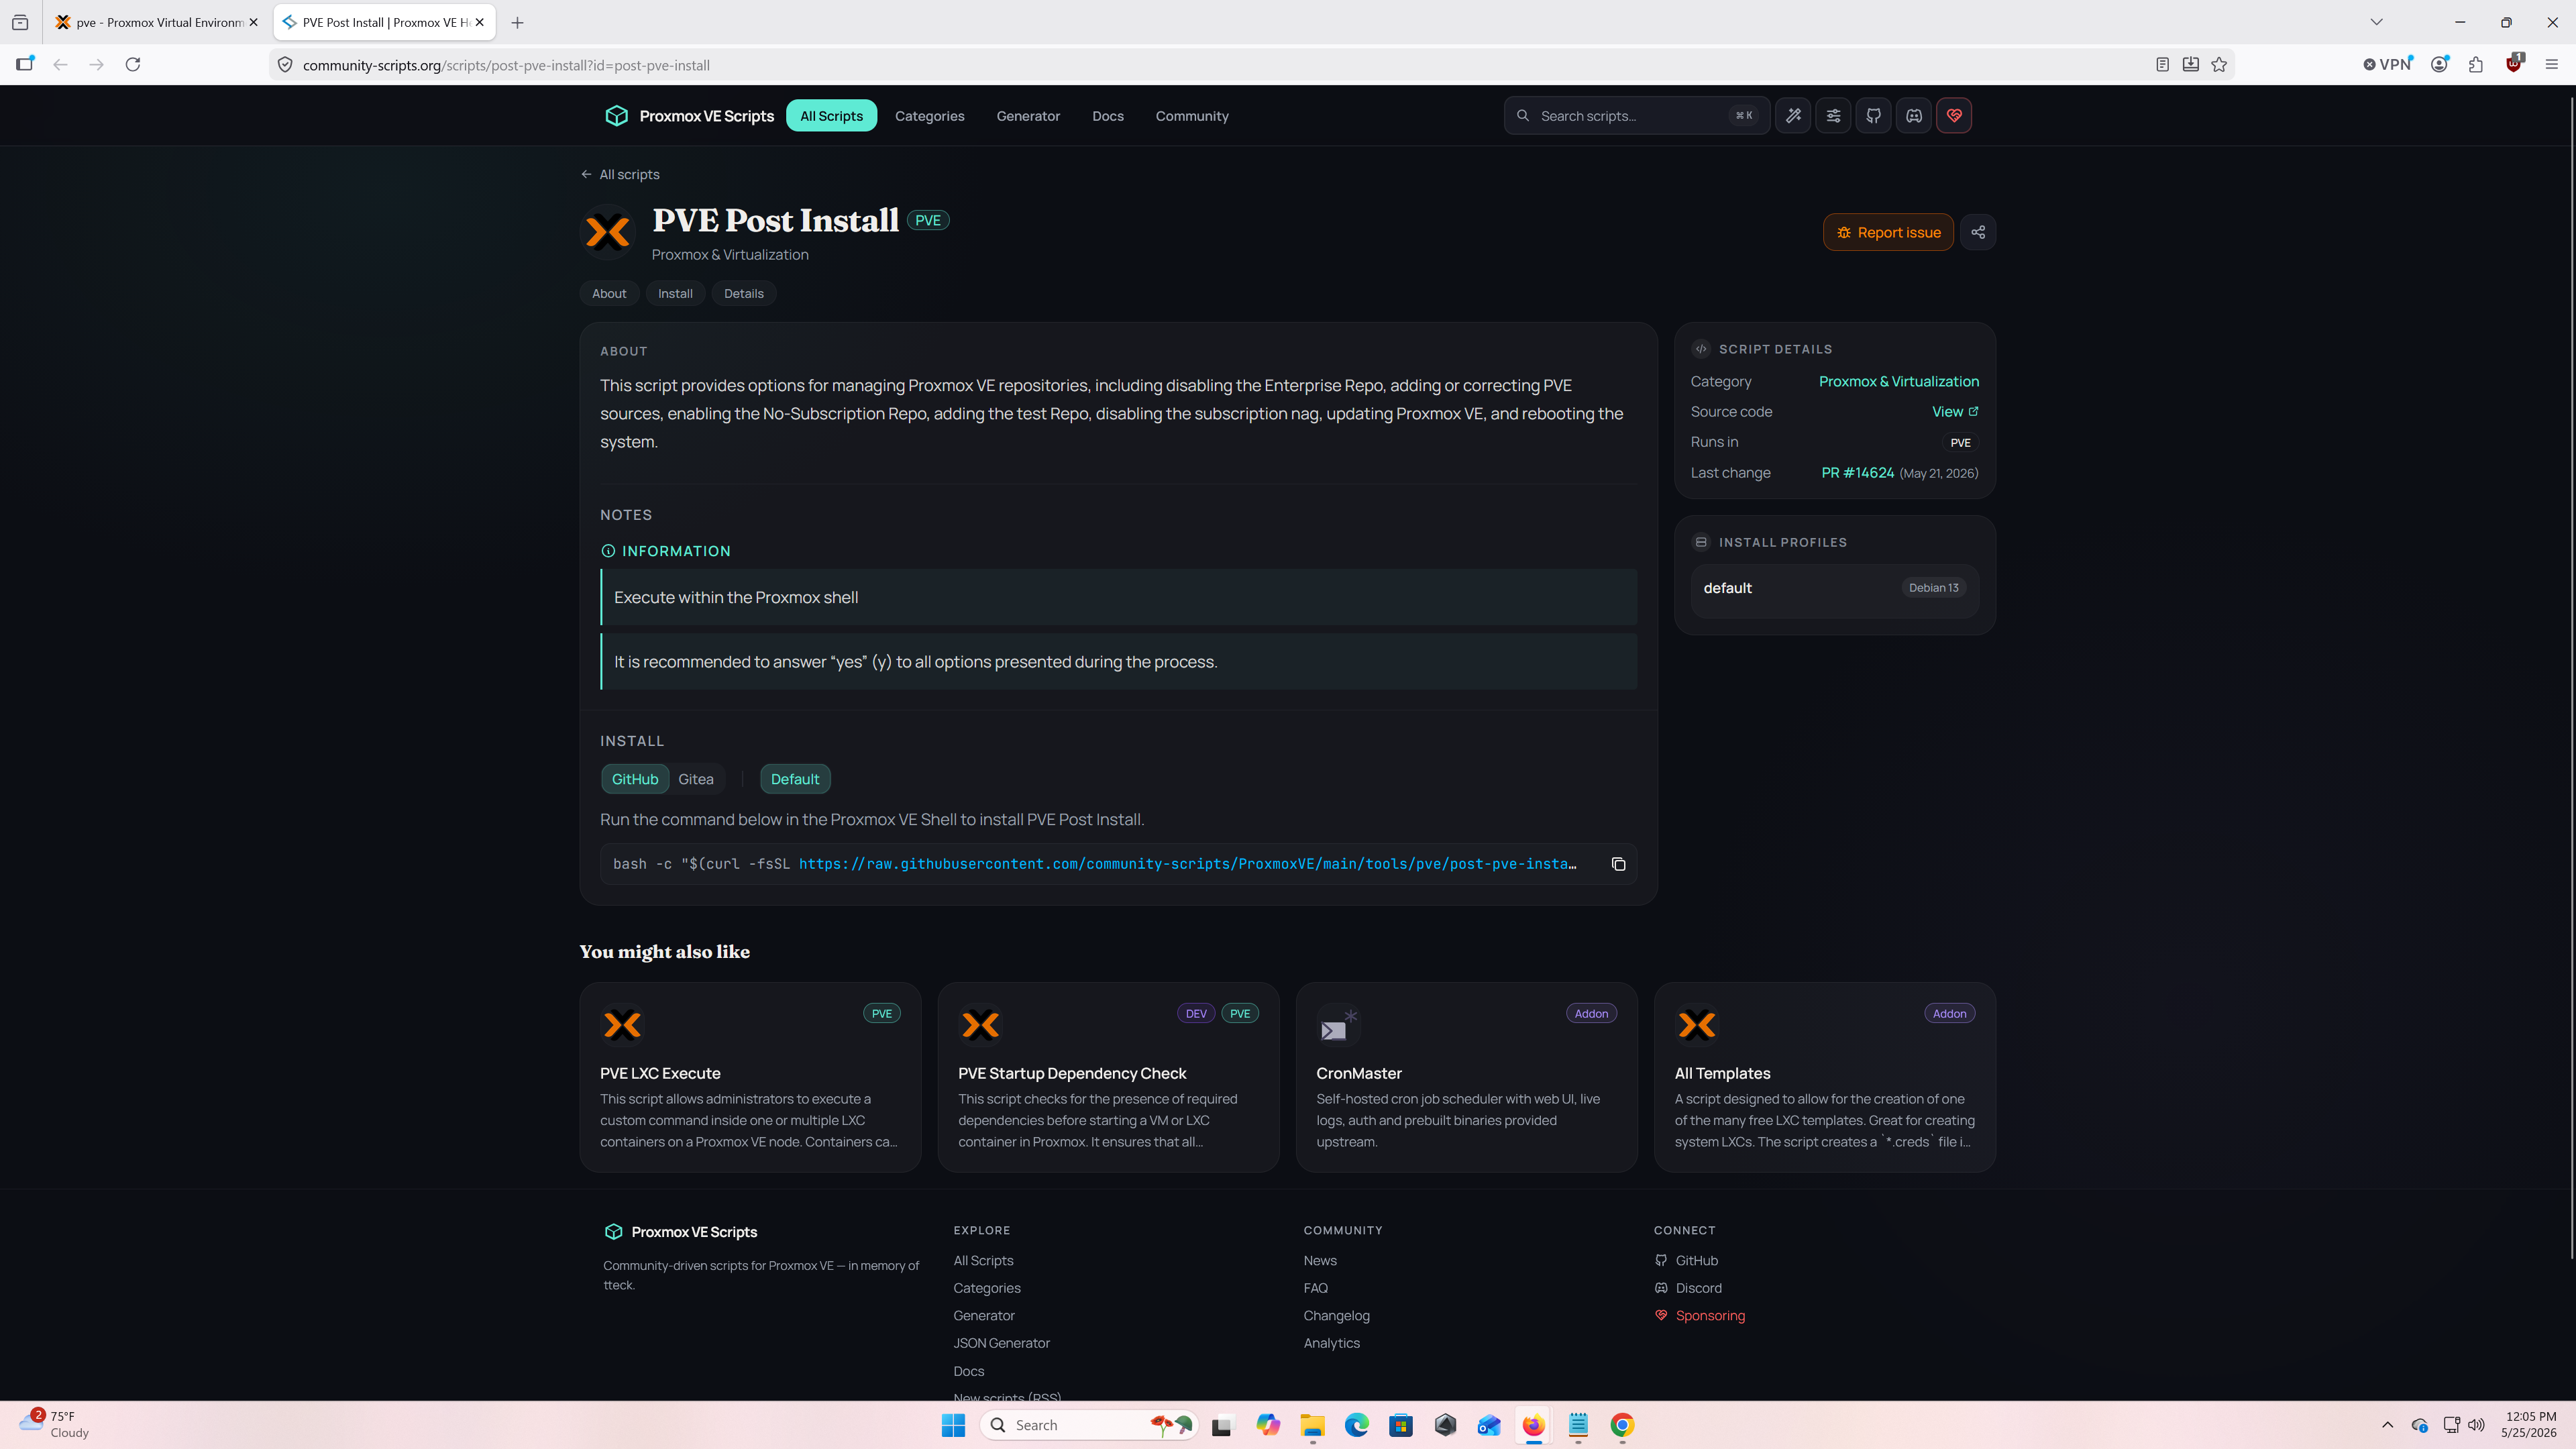
PVE Post Install script
Back in the Proxmox browser tab, select the hostname you entered during installation (mine is "pve") under the server view to enter the node view. Select Shell to open the command line, then right-click and paste the PVE Post Install script to begin the update process.
Proxmox main menu after login
Node shell
- pve-enterprise: disable (we want the no-subscription repository instead)
- ceph enterprise: disable (same reason as above)
- pve-no-subscription: yes (we will use this repository instead of the enterprise one)
- PVE-Test: no (I just want stable updates, not experimental ones)
- Disable Subscription Nag: yes
- High Availability: yes (I am only running one node, so I do not need high availability)
- Corosync: yes (not concerned with cluster availability right now)
- Update: yes
.png)
.png)
.png)
.png)
.png)
.png)
.png)
.png)
Once all options are selected, let the script perform the initial update and restart.
Network setup
The goal of this homelab is to learn both netwokring applications and skills as well as malware analysis. To achieve this, our networking pool of virtual machines will have connectivity to my main home network to practice configuration in a relaistic environment. When we get into the malware pool of virtual machines, we will shift to an "air-gapped" model in which our firewall will operate as the local-only gateway and act like a standard router without an uplink to my home network.
To set up the virtual network correctly, navigate to the Network tab under Datacenter. From there, you will see your nic's and the vmbr bridge. For me, vmbr0 is the bridge connection between my main network and my virtual network (ethernet connection between my Proxmox machine and physical ISP router.) Click Create and then Linux Bridge. For my use case, I will be creating 3 different entries. If you decide to run your Proxmox setup as a pure private / public network (no malware) then I would recommend connecting via RJ45 (ethernet) your Proxmox machine to your accessing machine (laptop or desktop).
- vmbr0 - Gateway 192.168.1.1 with bridge ports nic0 (creates WAN (Wide Area Network) for virtual network)
- vmbr1 - No IPv4 (we will set it up in our firewall), no gateway, and no bridge port (this will be our network lab LAN (Local Area Network))
- vmbr2 - No IPv4 (we will set it up in our firewall), no gateway, and no bridge port (this will be our malware lab LAN (Local Area Network))
.png)
Network tab
.png)
vmbr0
.png)
vmbr1
.png)
vmbr2
.png)
Final network layout
Once you have set up your bridges, you can move on to account creation (if you want separate accounts) or the backup schedule setup.
Account Setup
Since I am setting up Proxmox as both a networking/sandbox lab and a malware analysis lab, I will create a separate Linux OS account to access the virtual machines instead of doing everything as root. You can skip this section if it does not apply to you.
The first command to run is adduser (new username). It will prompt for a password and optional information like full name and office number.
.png)
adduser command
The next step is to give the new user sudo privileges so they can run commands with elevated permissions without exposing the root account. To do this, use the usermod -aG command. The -a flag stands for append (adds the user to the supplementary group without replacing existing group memberships) and -G specifies the supplementary group. Without -a, the -G flag would replace all of the user's supplementary groups, which can break sudo access.
.png)
usermod command
I am also going to set up the account with @pve access (Proxmox UI) for both API and GUI access. To do this, use pveum aclmod /pool/(pool name) -user (new username)@pve -role (role name). Pveum is the Proxmox permission and user management tool, aclmod modifies an ACL (Access Control List) entry, /pool/(pool name) isolates certain VMs to a pool (like a folder), -user specifies which user receives the permissions, and -role sets the permission level. Always limit role permissions — least privilege is an important security practice.
.png)
pveum aclmod command
To confirm the account is set up correctly, run the following verification commands:
- pveum user list — Shows all configured users and their realms
- pveum role list — Shows all roles and their assigned permissions (verify any custom role you created appears here)
- pveum pool list — Shows all pools you have created (think of pools as folders for your VMs)
- pveum acl list — Shows which users or groups have which roles assigned to which resources
.png)
pveum user and role list
.png)
pveum pool and acl list
If everything looks correct, we can move on to setting up backups!
Backup Setup
The final section covers setting up an automated backup schedule for Proxmox and its VMs. Start by navigating to the Datacenter tab and selecting Storage. From there, click Add and choose the Directory option. The ID will be the name used to mount that directory to the file system. The directory path can be anything inside /mnt/. For my lab, I created /mnt/HDD_backups. Once named, open the Content dropdown and select Backup, then click Add.
.png)
Backup directory creation
Clear your terminal if it is getting cluttered with the clear command, then use lsblk to list your storage devices. I know my SSD is 1TB and my HDD is 3TB, so I locate the sd(x) name matching my HDD by size — in my case, sda. If you have a large SSD for backups, it may appear under an nvme name. Once I confirm the correct device is sda, I run mkfs.ext4 /dev/sda to format the HDD with the ext4 journaling filesystem.
.png)
Locating HDD and running mkfs
Now mount the filesystem we just created on sda to the HDD_backups directory using mount /dev/sda /mnt/HDD_backups.
.png)
mount command
To make the drive persistent (automatically reconnects after reboot or shutdown), a few more steps are needed. First, get the UUID (Universally Unique Identifier) of your HDD using blkid. Locate your /dev/sd(x) or /dev/nvme entry associated with the mkfs command you ran earlier and copy its UUID. Then run nano /etc/fstab to edit the filesystem table for automatic mounting on startup. Navigate to the bottom of the file with the arrow keys and add a new entry: UUID=YourUUIDHere /mnt/directory ext4 defaults 0 2. Save with Ctrl+X followed by Y.
- UUID — Your HDD or SSD identifier number
- /mnt/directory — The directory path set up during the Proxmox GUI backup directory creation step
- ext4 — Tells the Linux OS the filesystem type used
- defaults — Standard mounting options
- 0 — Placeholder for the legacy "dump" utility flag; set to 0 to ignore it
- 2 — Fsck priority for boot-time disk checking; option 1 gives root-level priority which we don't want here, so 2 places it after the root filesystem
.png)
Modifying /etc/fstab
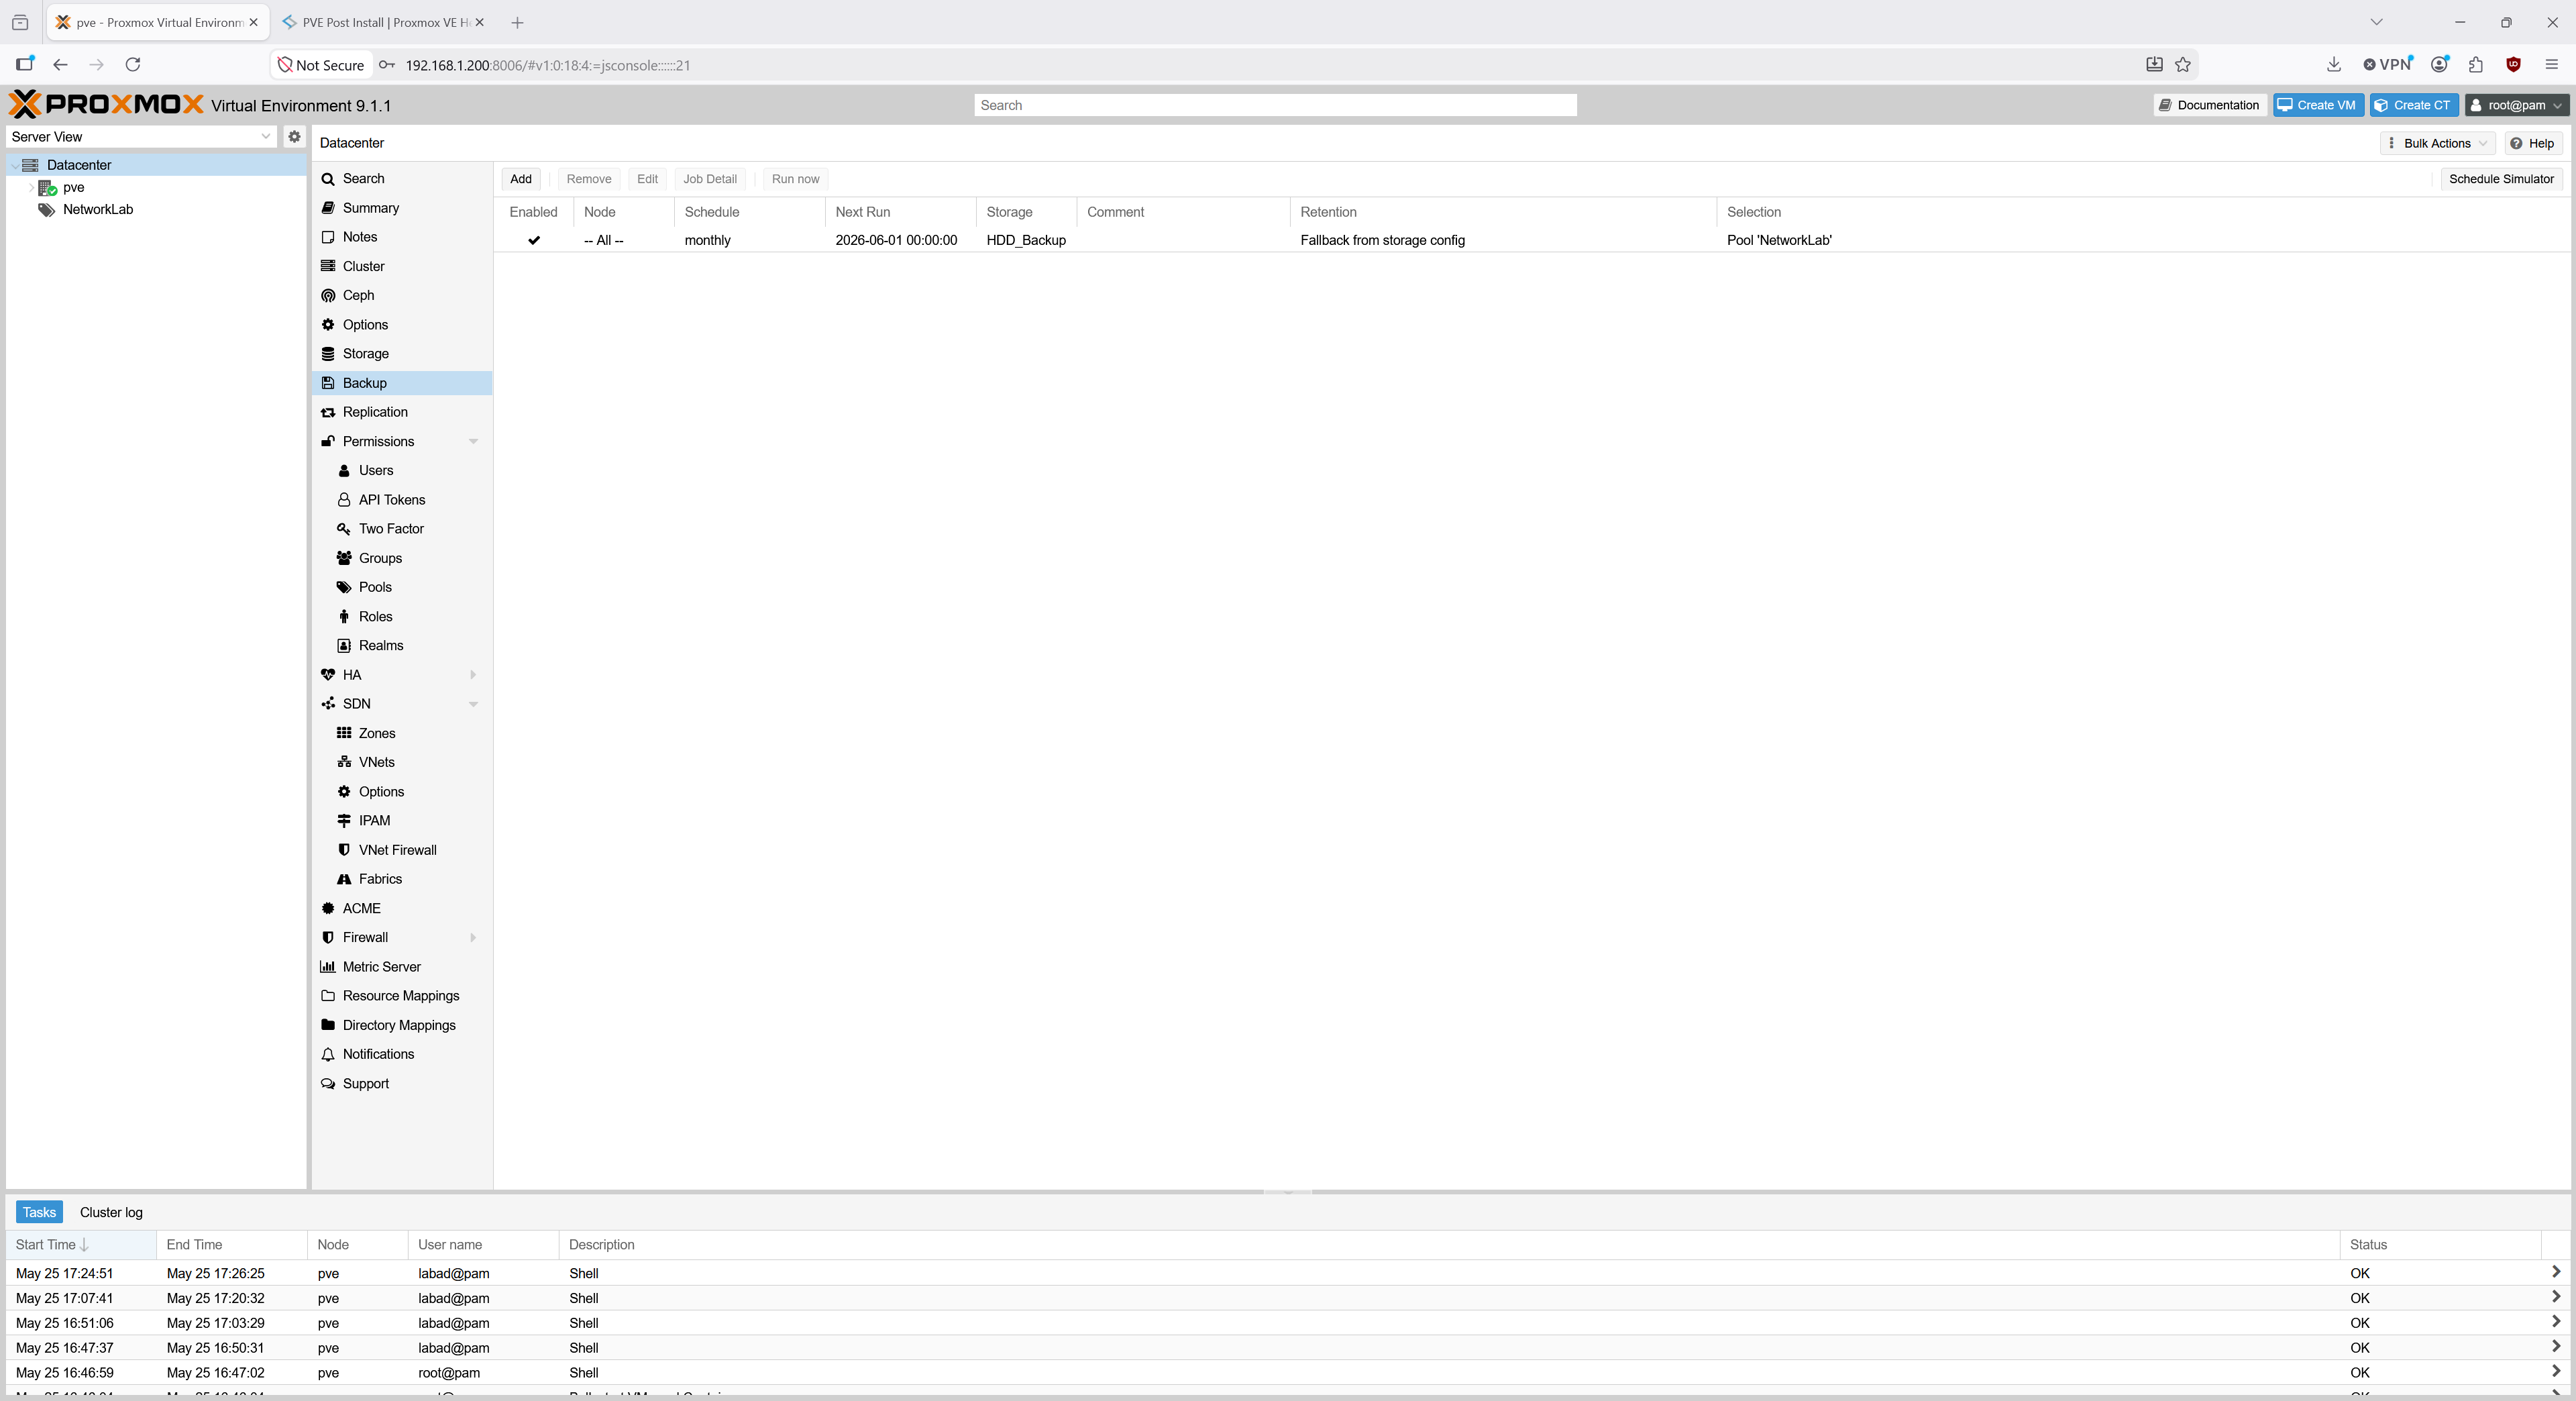
One more step! Navigate to Backup under the Datacenter tab and click Add. Configure the following:
- Node — Can be set to "all" unless you want specific nodes on different schedules
- Storage — The storage name you gave during backup directory creation
- Schedule — How often you want backups to run
- Selection mode — I set it to pool mode so the malware lab stays on a separate storage from the network lab
- Compression — ZSTD is a solid choice; it balances speed and compression ratio well
- Mode — Leave it on "Snapshot" unless you want VMs to pause or shut down during the backup
.png)
Backup job creation
✓ Congratulations — You're Finished!
Problems
These are some problems I encountered during the installation and setup process.
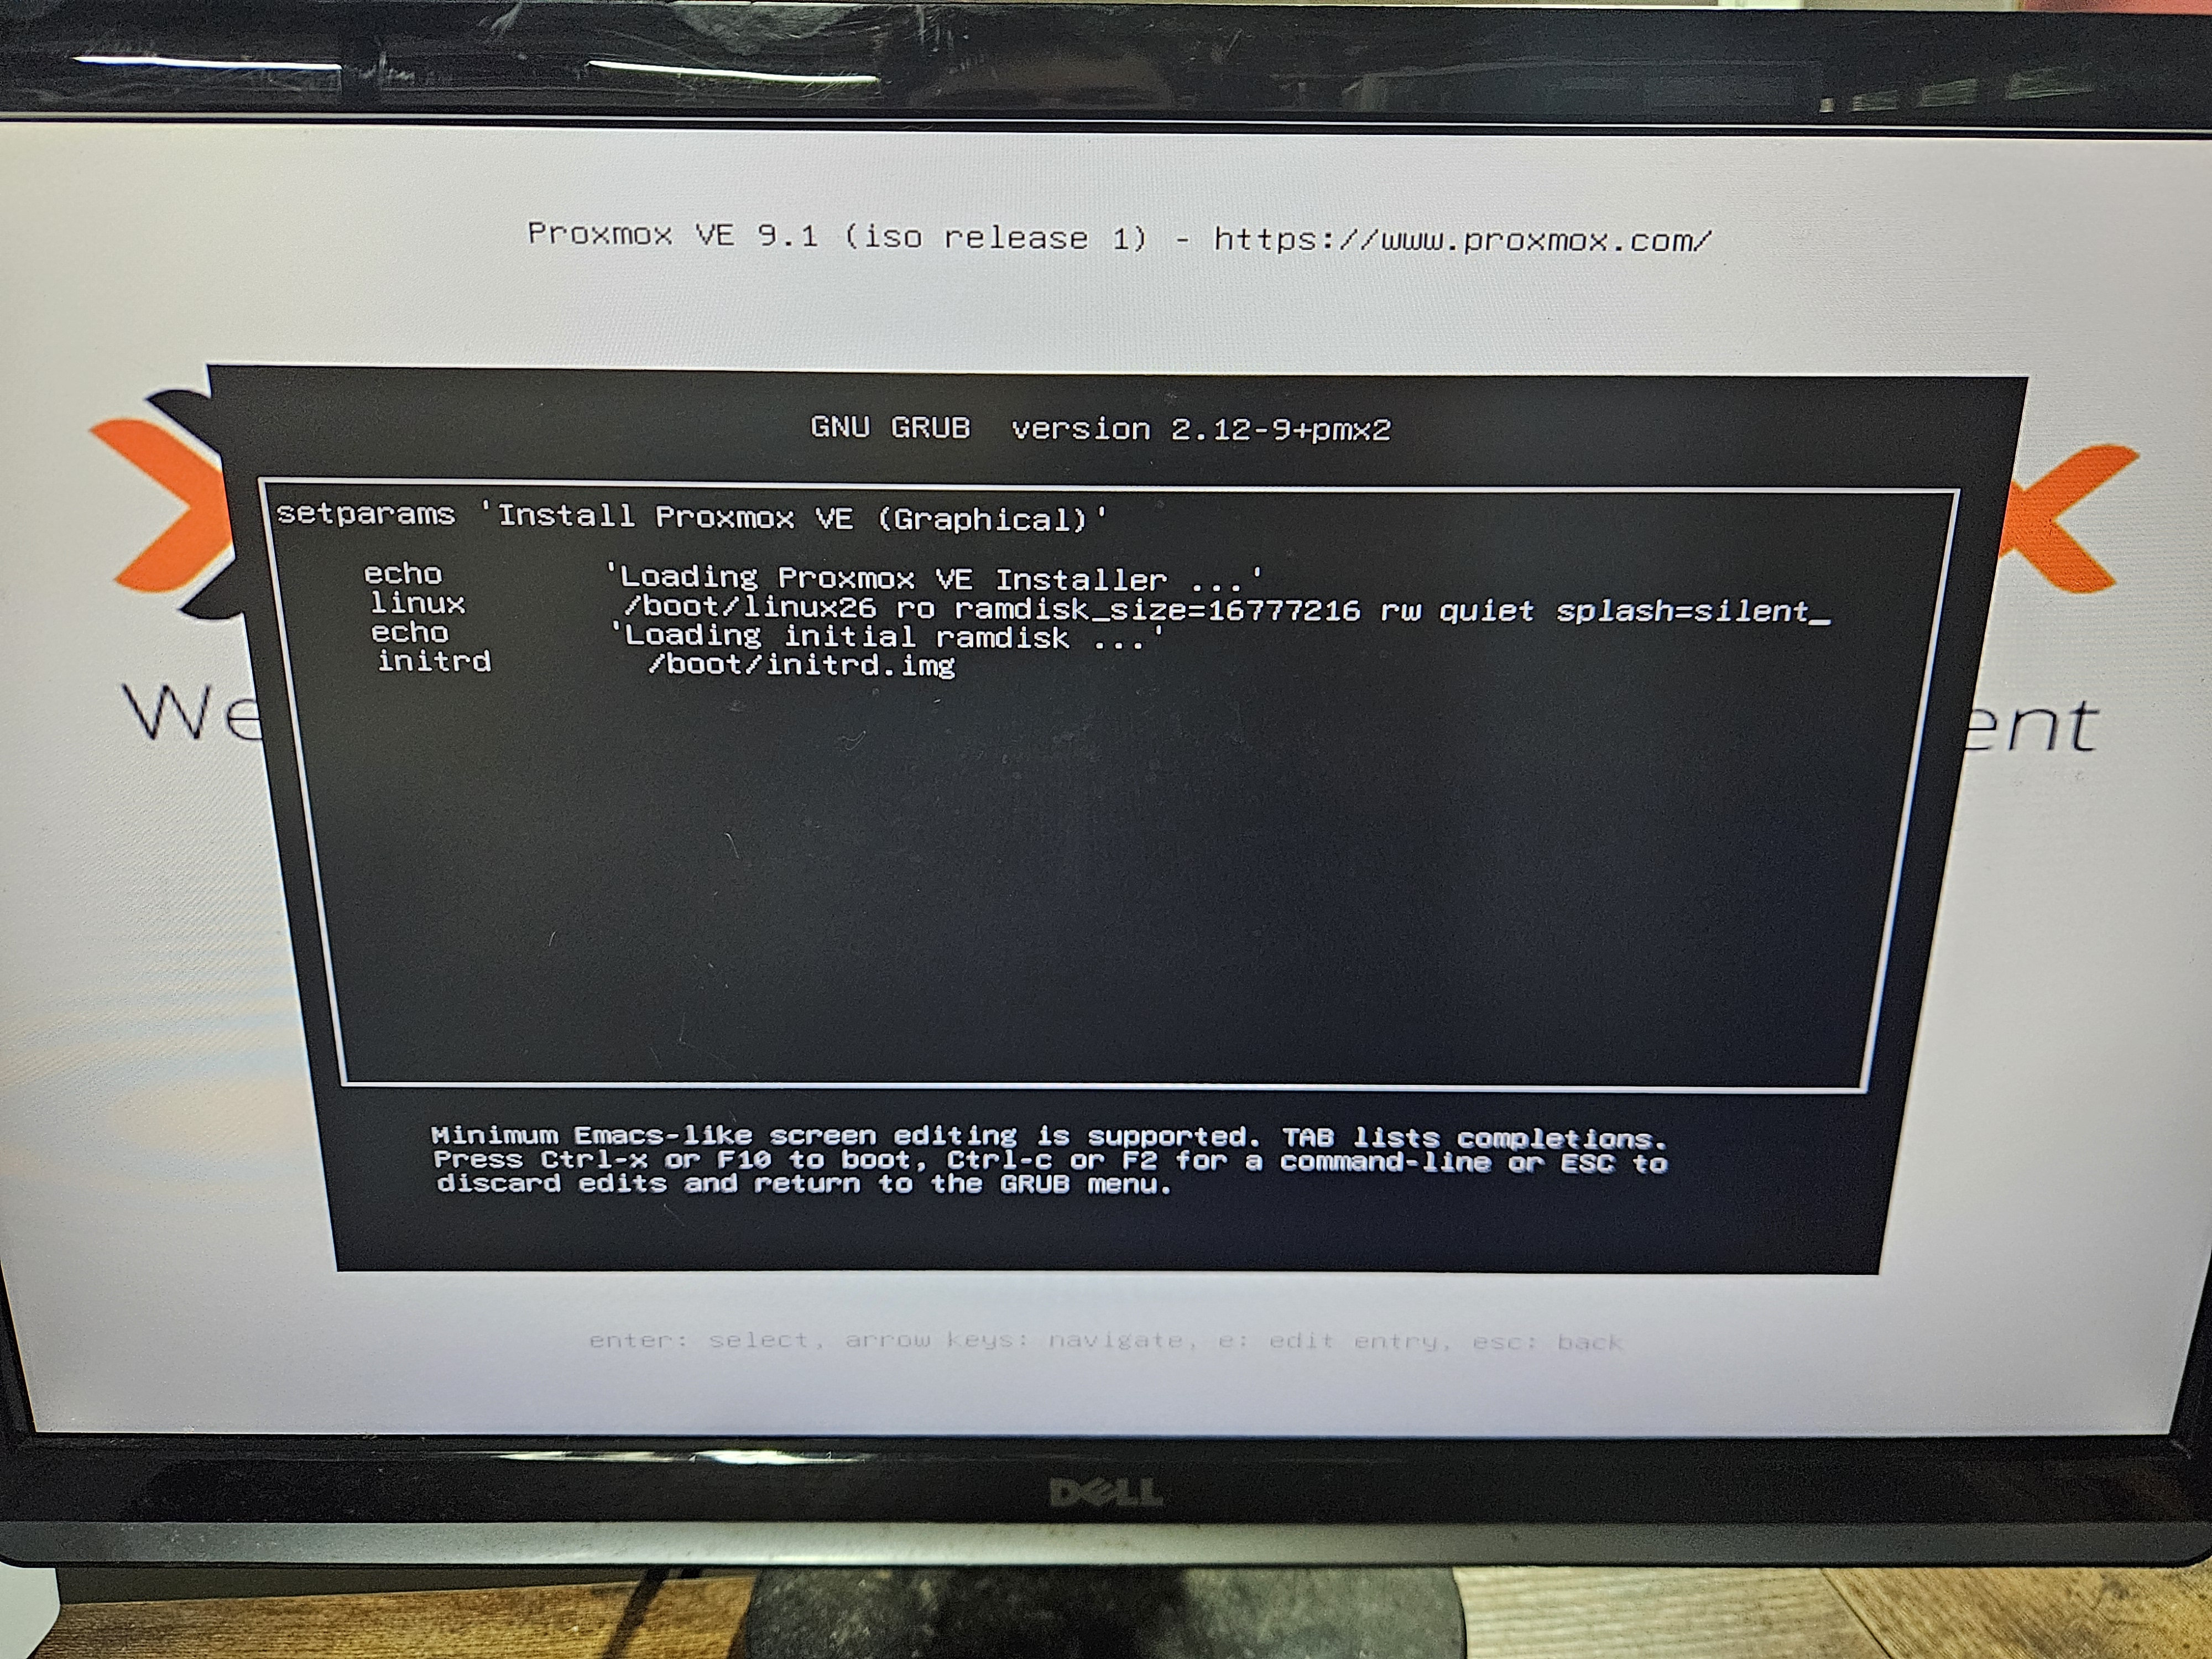
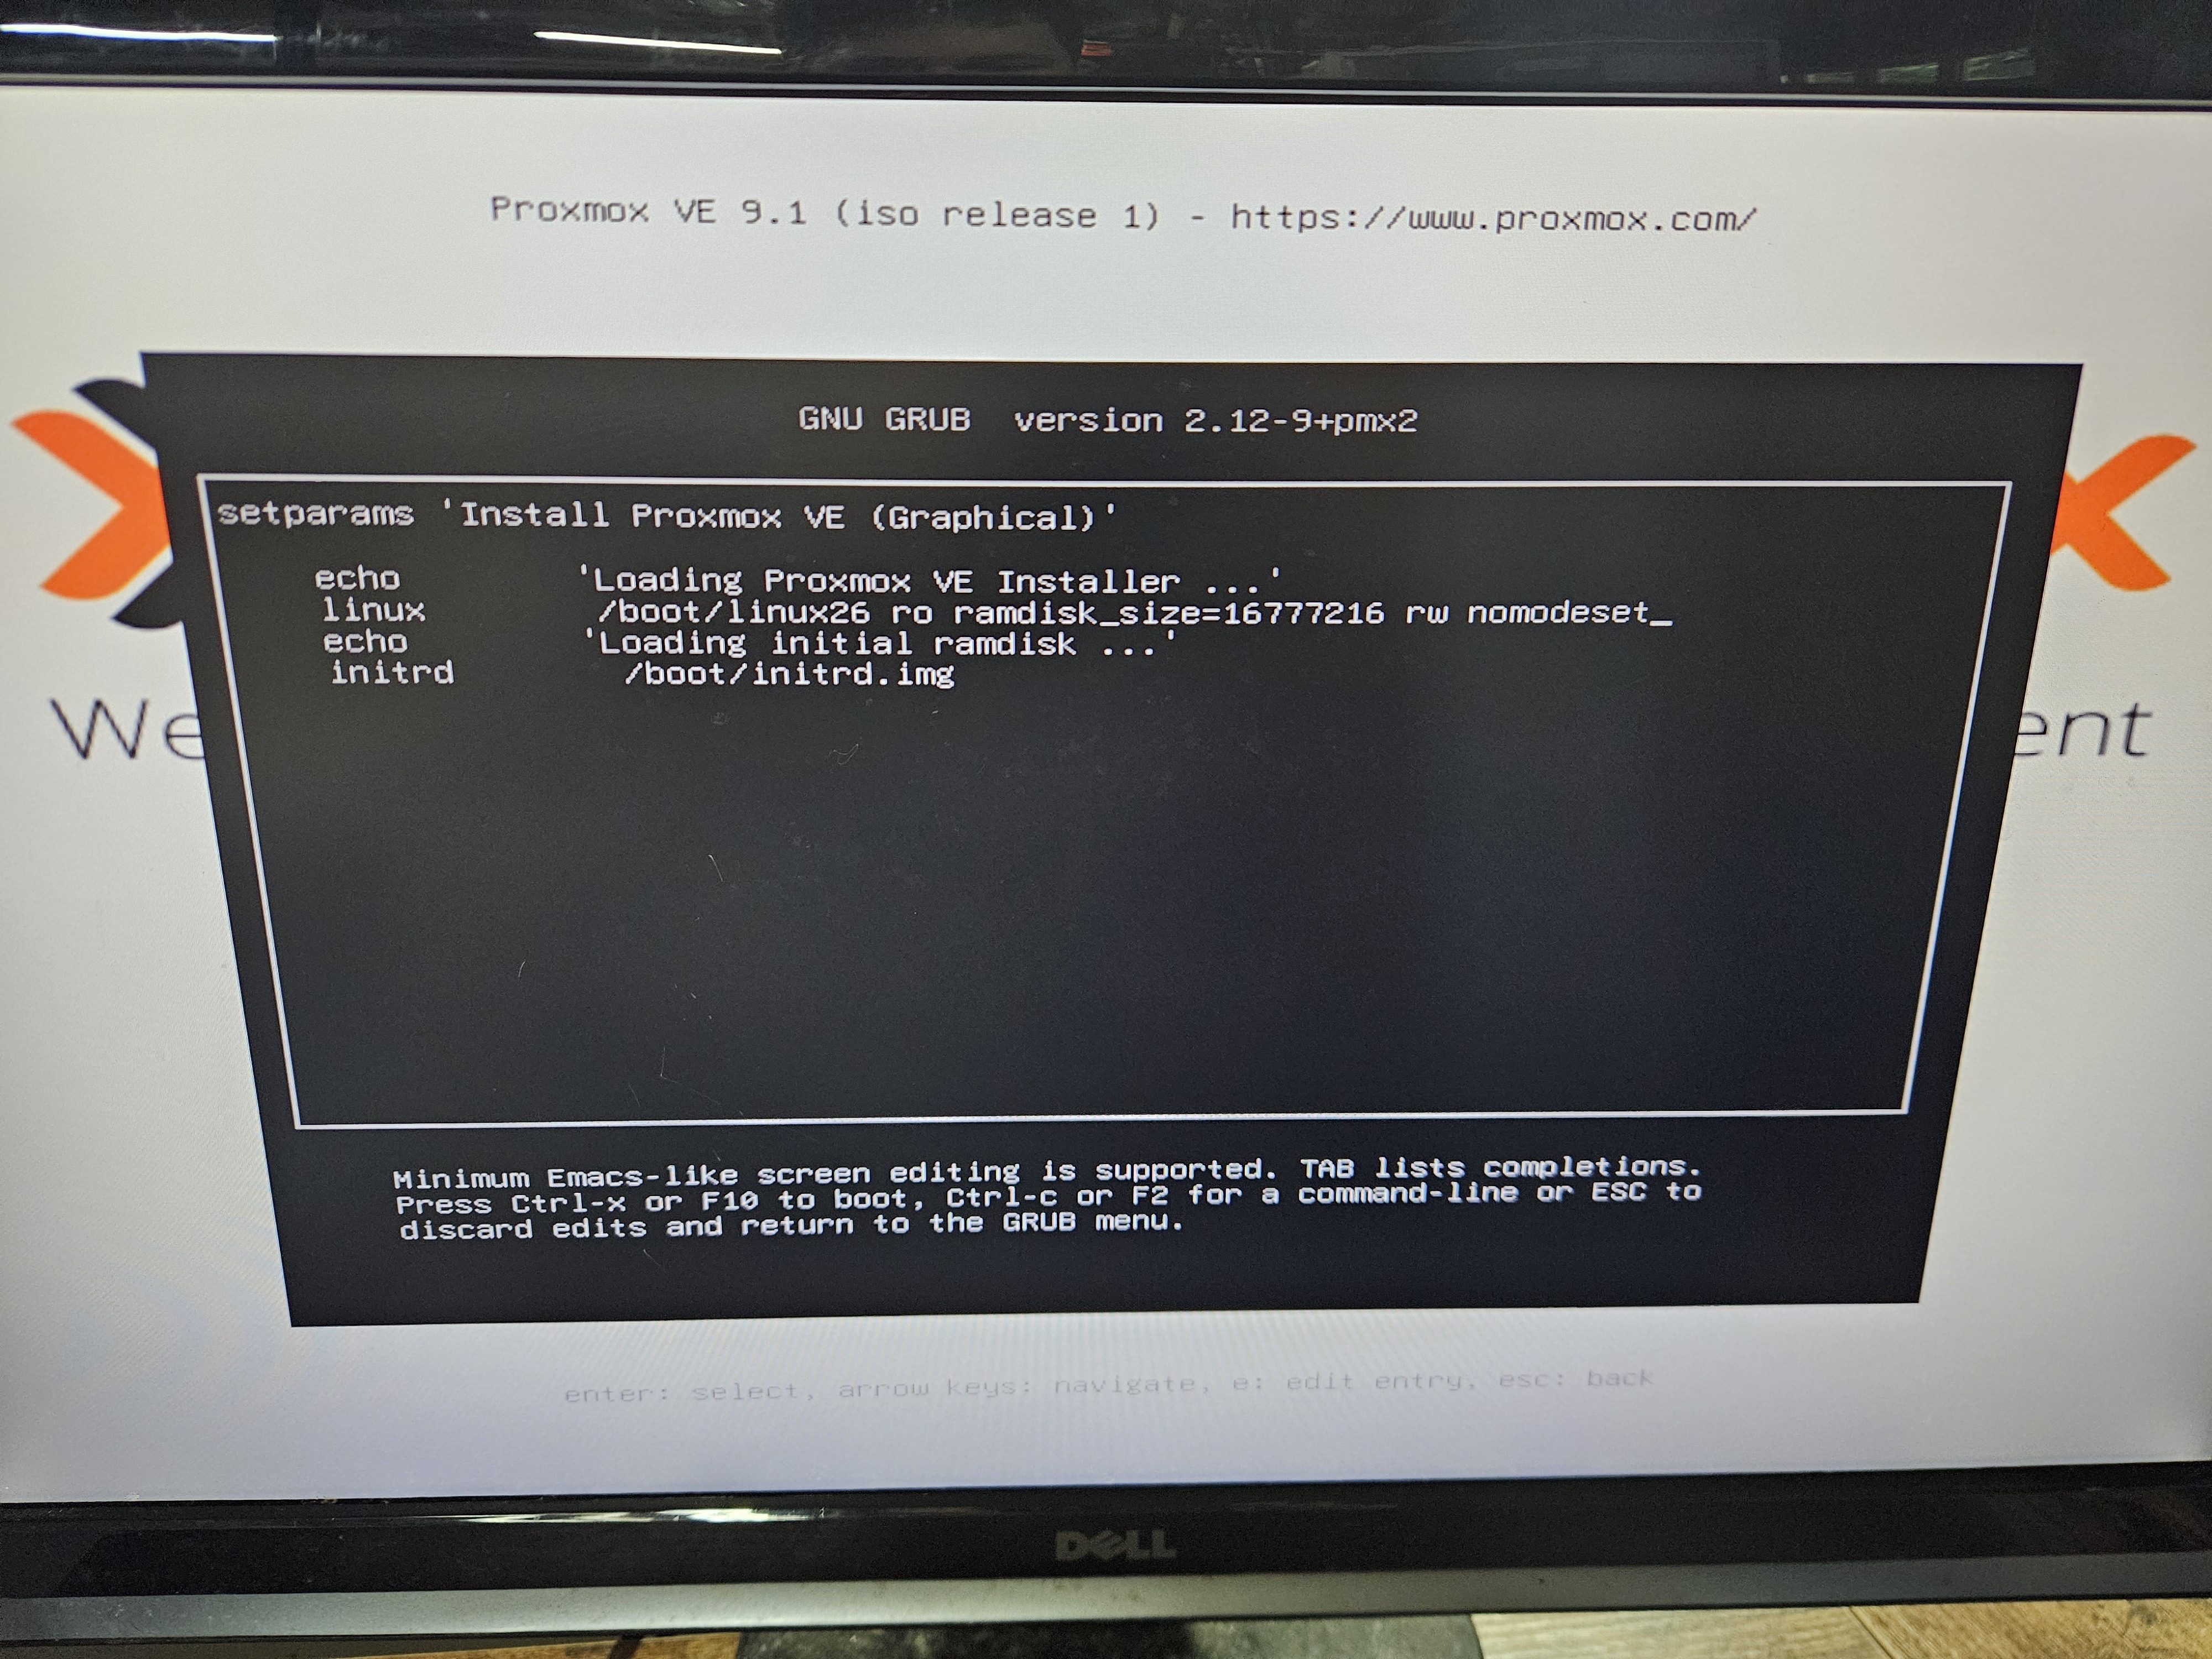
The first problem I ran into was at the very beginning of the Proxmox install. When selecting Install Proxmox VE (Graphical), I immediately hit a bug that caused the GUI to freeze. To fix this, I highlighted over the option and pressed "e" to edit the boot entry. Find the "linux" parameter line and change quiet splash=silent to nomodeset so the line reads /boot/linux26 ro ramdisk_size=xxxxxx rw nomodeset. Then press Ctrl+X to boot.

Frozen Proxmox GUI
Unmodified boot entry
Modified boot entry with nomodeset
Terms & Concepts Used
Proxmox VE
A Linux-based virtualization platform used to manage virtual machines and containers from a web interface or command line.
ip addr
A Linux command used to view and manage network interfaces, IP addresses, and subnet information.
journalctl
A Linux command used to view system logs collected by systemd, useful for troubleshooting services and boot issues.
CIDR
Classless Inter-Domain Routing notation (e.g. /24, /16) that defines how much of an IP address represents the network versus the host portion.
Proxmox Shell
The built-in terminal in the Proxmox web UI that gives direct command-line access to the Proxmox node's Linux OS.
adduser
A Linux command used to create a new user account interactively, including home directory and password setup.
usermod
A Linux command used to modify an existing user account, such as adding the user to groups or changing account settings.
pveum
The Proxmox User Manager command-line tool used to manage users, groups, roles, and permissions in Proxmox.
WAN (Wide Area Network)
a large-scale computer network that spans a broad geographic area—such as cities, countries, or even the globe. It typically connects smaller local networks (LANs), like branch offices and data centers, allowing users to share data and resources globally.
LAN (Local Area Network)
a computer network that interconnects devices within a limited geographical area, such as a home, office, or school campus.
aclmod
A pveum subcommand used to modify Access Control List permissions by assigning roles to users or groups on Proxmox resources.
pveum user list
Displays all user accounts configured in Proxmox, including local and external-auth users.
pveum role list
Shows all available Proxmox roles and the permissions included in each role.
pveum pool list
Lists all Proxmox resource pools used to group VMs, containers, and other resources for easier permission management.
pveum acl list
Displays all current ACL entries, showing which users or groups have which roles on which resources.
mkfs
"Make filesystem" — a Linux command used to format a partition or disk with a filesystem like ext4, xfs, or btrfs.
lsblk
"List block devices" — displays disks, partitions, mount points, and storage device layout.
/etc/fstab
A Linux configuration file that defines which filesystems and drives should automatically mount during system boot.
nomodeset
A Linux kernel boot parameter that disables GPU mode-setting drivers, useful for resolving installer freezes on systems with certain graphics cards.
blkid
A Linux command that displays block device attributes including UUID, filesystem type, and label — used here to find the HDD UUID for fstab.